How to Install a Metal Ceiling Tile Backsplash


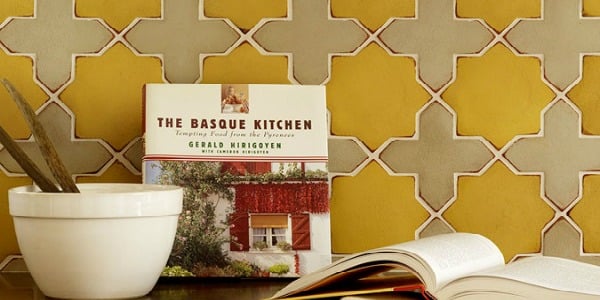
I have loved the idea of using metal (or metal look) ceiling tiles since spotting the idea on Pinterest forever ago. But I didn’t love how traditional or farmhouse it looked with the traditional design. When we spotted this pebbled looking steel tile, we knew that’s what we wanted to go with. The faux tin (read: plastic) tiles that you can get are apparently simple to adhere with mounting tape, but steel? We needed something stronger. We used GE Iron Grip adhesive which is a silicone adhesive and it worked SO well. Even where we’d kind of bent the steel tiles in cutting them, it held the tiles flat. And I’m comfortable using a caulking gun so application was a breeze. Before I chat too much, let’s get down to the detailed ‘how-to’.
Thanks to GE Iron Grip 100% silicone adhesive for sponsoring this post. All opinions are our own. Learn more here about how partnerships help us keep Remodelaholic running, at no cost to our readers.

Metal Ceiling Tile Backsplash Tutorial
You’ll Need:
- Steel Ceiling Tiles (we used these ones)
- Tin Snips (or a rotary cutter)
- Measuring Tape
- Permanent Marker
- Large Square
- Caulking Gun
- GE Iron Grip 100% Silicone Adhesive
- GLOVES!

Steps For Installing A Metal Ceiling Tile Backsplash:
1. Choose which edge you’re going to start from. We started in the corners that are the most ‘obvious’.
2. Measure, mark, then draw your cut lines using a level.
TIP: Make sure you mark the backside of your tile!
If you didn’t have shelves, ledges, and cupboards going on (this laundry space had a LOT of obstacles), you could use full tiles which would make your job SO much simpler!! Additionally, if you are replacing countertops, consider leaving a small gap at the back of the countertops for the tile to slide into. This will save you from having cut edges showing. You can apply a bead of clear silicone to seal it up if you like after the tile is installed (especially if this is for a kitchen!!).


3. Cut your tiles using either tin snips (like us) or a rotary cutter (this would have gone 100x faster!). Make sure you wear gloves! You’ll notice in the video I’m not wearing them. I got through one tile. So many tiny cuts. Just wear gloves!!!
As you’re cutting, you’ll need to bend the tile- take care to bend the piece that will be scrap. Also- cut in one direction only! If you cut from the edges in to the middle, you’ll get a sharp piece where the cut directions meet.

4. When it’s cut to size, you can apply the GE Iron Grip 100% silicone adhesive to one of the surfaces, remember we had metal tile adhering to drywall, (I applied to the tile), then position into place.

A few things to make note of. I really loved that this adhesive is clear! I’ve gotten so used to using construction adhesive for everything and that stuff is really gosh darn ugly if it oozes out the edges. I also loved that you had five minutes to adjust before the adhesive started to set. This was great because you want to get the tiles perfectly lined up along the edges, so it takes some adjusting. When you get them in position, apply pressure for about 30 seconds to make sure they’re in place.
I had one pretty warped piece (thanks to my cutting job) that I chose to press a bit longer, and am happy I did as it has stayed put. If you need to cut around an obstacle, we found it best to use a chisel and hammer the corners (punching through) to make a template to cut with the tin snips. I know some people use a drill to get it started instead. Again… a rotary cutter/grinder would have made this process a dream.


This project looks complicated- but it was really quite simple for us! We finished the backsplash in one evening (including all those finicky cuts!). The one thing I do wish I’d done differently (other than getting a grinder/rotary cutter) is staining the back of the countertops! Those countertops are DIY (wood) and we took care to stain every part that would show but didn’t realize just how reflective these tiles are (which is great for light!). You can see in some photos the yellowish reflection (wood) right at the bottom where the pieces are tucked behind the countertop. It’s a little thing, but it is noticeable. Speaking of countertops- you can also adhere the countertops to cupboards using this adhesive!!

That’s all there is to it! This project really took the space from nice to something special. I’m so thrilled with how it turned out. What do you think? Would you try a different material such as these ceiling tiles as a backsplash?

Thanks to GE Iron Grip adhesive for sponsoring this post.
I'm the DIY and lifestyle blogger behind Lemon Thistle: home to DIY, hand lettering, home décor and design. I’m a mom to three kids under three, I love to entertain, and my awesome hubby and I are working our way through major renovations on our new home. I believe you can have a beautiful life, home, and party without spending a lot.


When I move if it’s not too busy with the new countertop I’m following your great example love the look thanks for all the wonderful ideas
It looks like you have a cabinet or wall at each end of your counter…if that was not the case, how would the raw edge look? If these are ceiling tiles they may have a straight piece to slip on the edge to have a finished edge…?
Wow, I love the look of that metal backsplash with your counter tops. It’s so beautiful! It looks like this is a relatively easy project too. Thanks for sharing!
How difficult is it going to be to remove when that time comes? We’ll the adhesive damage the drywall? Love the look!
You misspelled the word “tomorrow” on your otherwise cute blackboard decoration.
Were you able to buy just a few ceiling tiles? Or did you have to buy an entire box?
Would this project be used as a kitchen backsplash? I love how it looked for you. My cupboards are off white and a dark almost black counter top.
I also did stainless steel ceiling tile for a backsplash in my kitchen. However, my house had to be raised about 14 feet after a hurricane. The house has now settled and there is now a small gap in some areas between the backsplash and the countertop. Do you recommend anything I can use for this gap?
How do you clean this tile grease buildup
A bit of soap, just like any backsplash! This is in the laundry so not so much grease here.