Wainscot DIY
Find out how you can wainscot a room of your own! Wainscot DIY!
Submitted By: Southern Lovely

My name is Lindsay & I blog over at Southern Lovely. I have three little ones who keep me super busy. I love spending time with my family & building beautiful memories. When I have free time, I love to create anything & everything. It usually happens late at night, but I really enjoy making it happen. I love a good DIY & am always up for a fun sewing project. Being able to create for less is a big bonus!
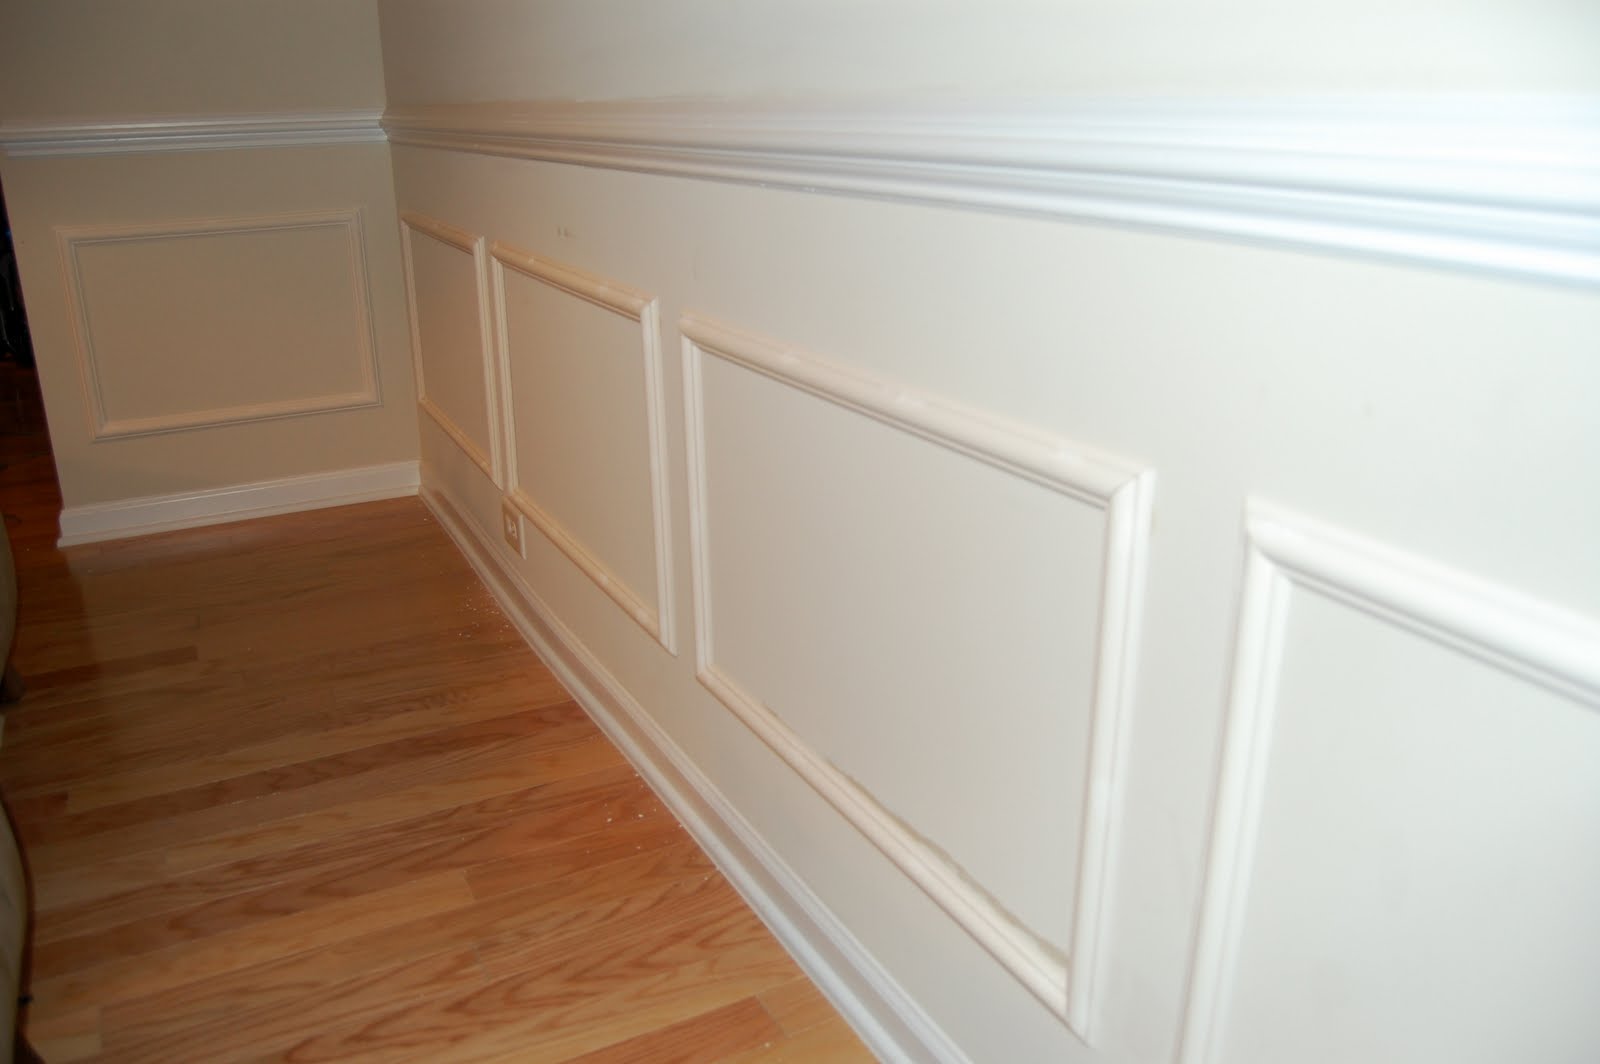
The next big project we tackled around our house, was installing wainscoting by ourselves. It has made the biggest difference, by creating a new look to our front room. Once again, I don’t know why it took so long for us to do this, we have been in our home for over five years.
Supplies needed:
Chair Rail (if not already on wall)
Trim
Liquid Nails
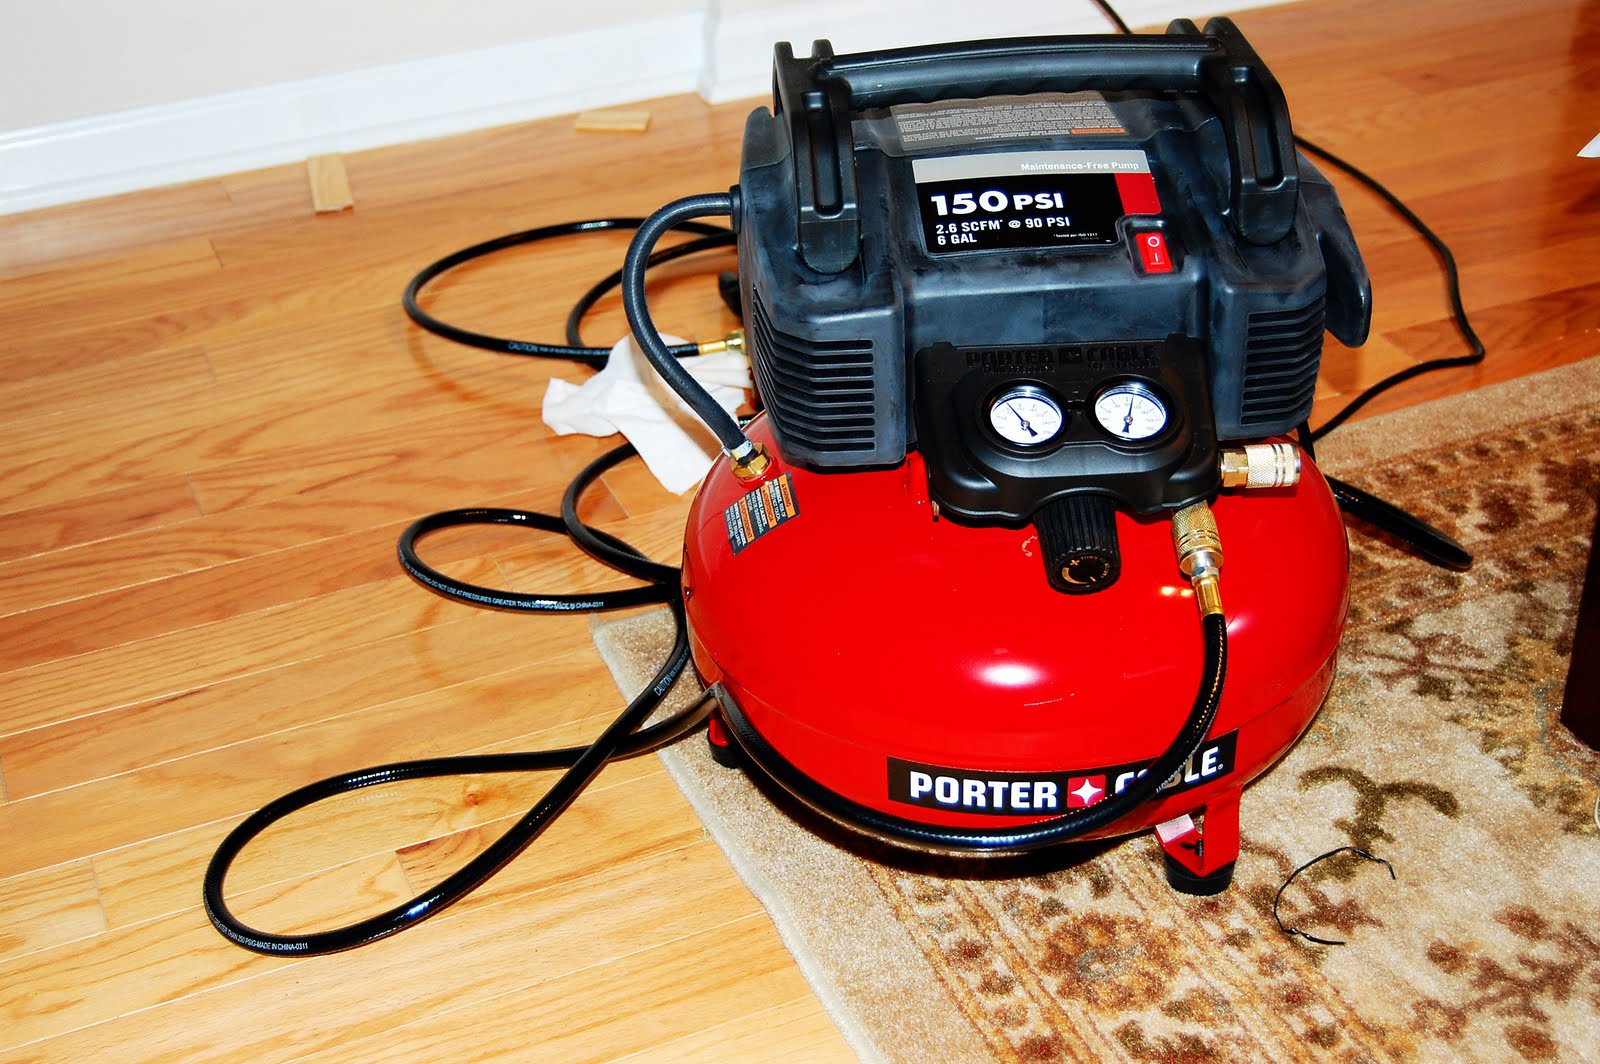
Nail Gun or hammer
Air compressor (if using nail gun)
Spackle
Sandpaper
Painter tape
Primer (if needed)
Paint

The room started like this..
We already had the chair rail in our front room, so that was one less step for us. You will have to install this otherwise.
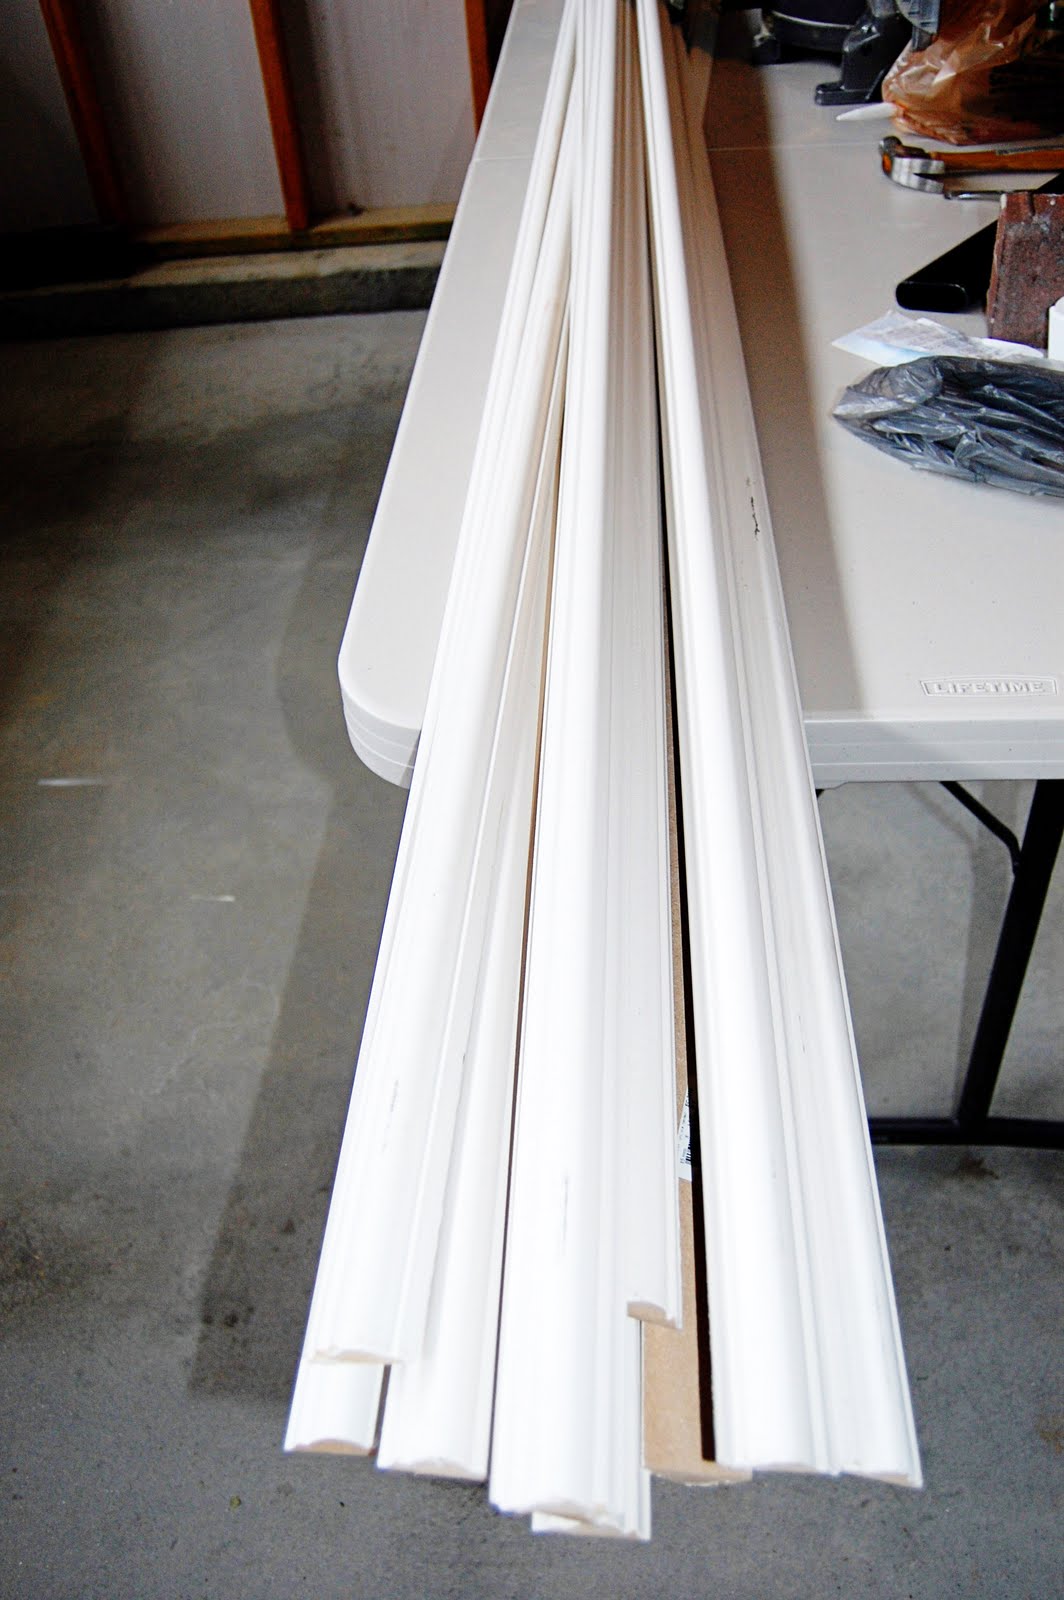
Then my husband cut the trim to create a frame. Depending on how large (or small) you want your frames to be, figure this measurement out beforehand.
Map out where you’d like your frames to go, then apply them using liquid nails & a nail gun (or hammer them in yourself). And from what my husband told me, this little nail gun & air compressor saved him SO much time. Great investment, since I’m sure this won’t be the last of our projects. 🙂

Fill in the nail holes with Spackle, then sand it down after it dries.
Place painters tape around the edges, so you only get paint where you want it. 🙂
Now paint! We didn’t prime, because there was no need for us with our walls being so light.


After your paint is dry, remove your tape & admire your work.


And that’s it! Pretty simple, right?!
And makes for a really nice change!

Cassity Kmetzsch started Remodelaholic after graduating from Utah State University with a degree in Interior Design. Remodelaholic is the place to share her love for knocking out walls, and building everything back up again to not only add function but beauty to her home. Together with her husband Justin, they have remodeled 6 homes and are working on a seventh. She is a mother of four amazing girls. Making a house a home is her favorite hobby.


Thanks for having me! So excited to be here!
That looks gorgeous, and I love the way it pulls the room together. So easy, but such a big impact!
Dear Lindsay,
Thank you for sharing and making me feel like I might actually be able to tackle this project myself. I’ve had something like this in mind for our living-room ceiling but keep putting off planning it ‘for real’ as it seemed daunting… But now, maybe!
Love,
Planning in NE
Fantastic job!
This turned out very nice. It has such a clean scrisp look. We have a small compressor too and I just love it.
Traci
Love this! We are getting ready to do this in our dIning room. Question – I am having trouble matching the white to our trim color. Any suggestions?
What a great idea. You made it look so simple and easy, but I am sure it is not. It’s a great look.
Seems pretty easy to do if only I have all the things needed. Thanks for sharing this great idea. I love to read this blog.
Looks pretty easy if only I have the all the things neede I can start right away. Thanks for sharing, this blog helps me a lot.
What a beautiful room! Thanks for sharing the gorgeous results. I’m trying to convince the hubby that we should take on a similar project, but he isn’t sold yet. Hopefully I can get him onboard 🙂
4 questions for you:
1) What size did you make your frames?
2) How much space did you leave between frames?
3) How much trim did you need for the entire project?
4) How much did the project cost?
Thanks!
Hi Karen! Sorry for my slow response. This was a guest post so if you’ll head over to the guest’s blog (linked at the top of the post) then she can answer your questions! Thanks!