I recently had a special request to give some instructions on retrofitting a wardrobe or armoire. Now Normally, and unfortunately I don’t have a lot of time to figure out how to do it and write a whole post about something like this if we can’t use it for our home- we are just SO busy! But it just so happens that we have done this ourselves and so I thought I would give it a try.
In our last house we had very little space. We also had no extra money, and a lot of old furniture. But one thing we always have plenty of? Imagination, as Anne of Green Gables would say, that and a whole lotta tools. So, when working out a place to house our tv, we decided to revamp an old cedar wardrobe we had been given.
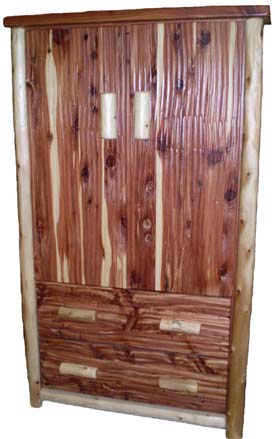
Now this was before I really started blogging so I didn’t take pictures! Gasp! And unfortunately, I don’t have an original picture but I searched for some images and found one or two that will give you an idea of what we did. This one is most similar, (it is from Bower Power).
The top was not ornate like this, on the bottom there was a fixed drawer, and actually the front skirt was broken like this one too.
Okay, so now that you can understand why it needed to change, here is what we did.
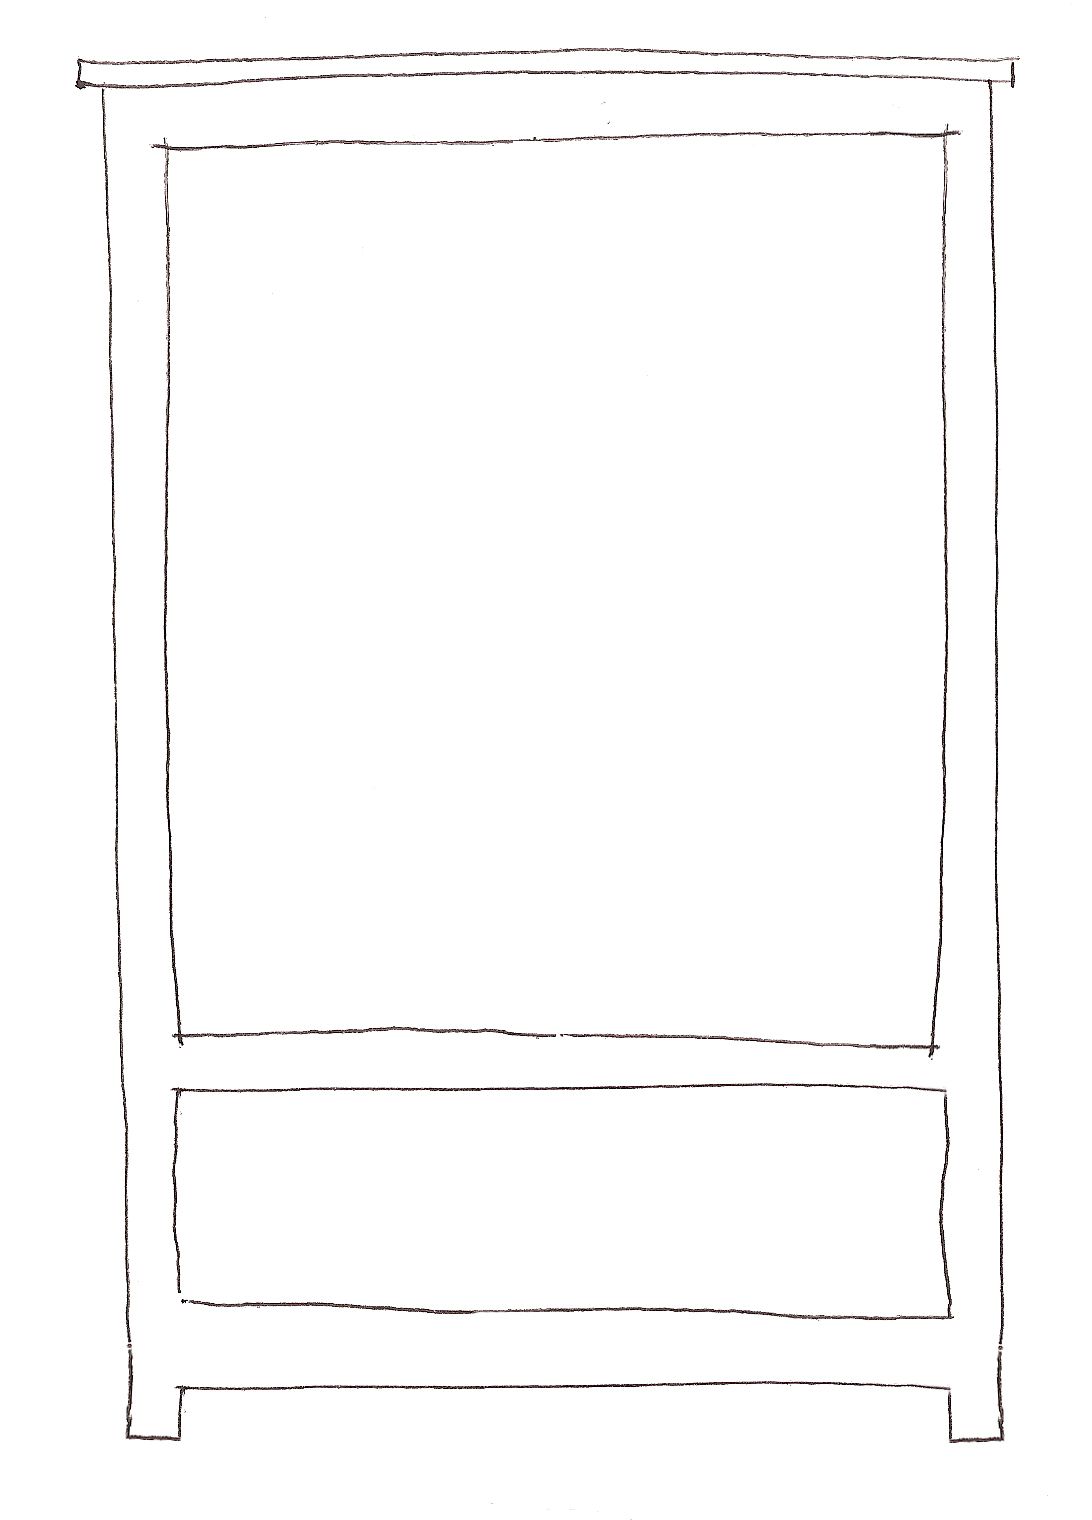
I drew some quick sketches to explain:
This was the basic cabinet, with two 2/3 legnth doors, a fixed drawer and an attached skirt on the bottom.
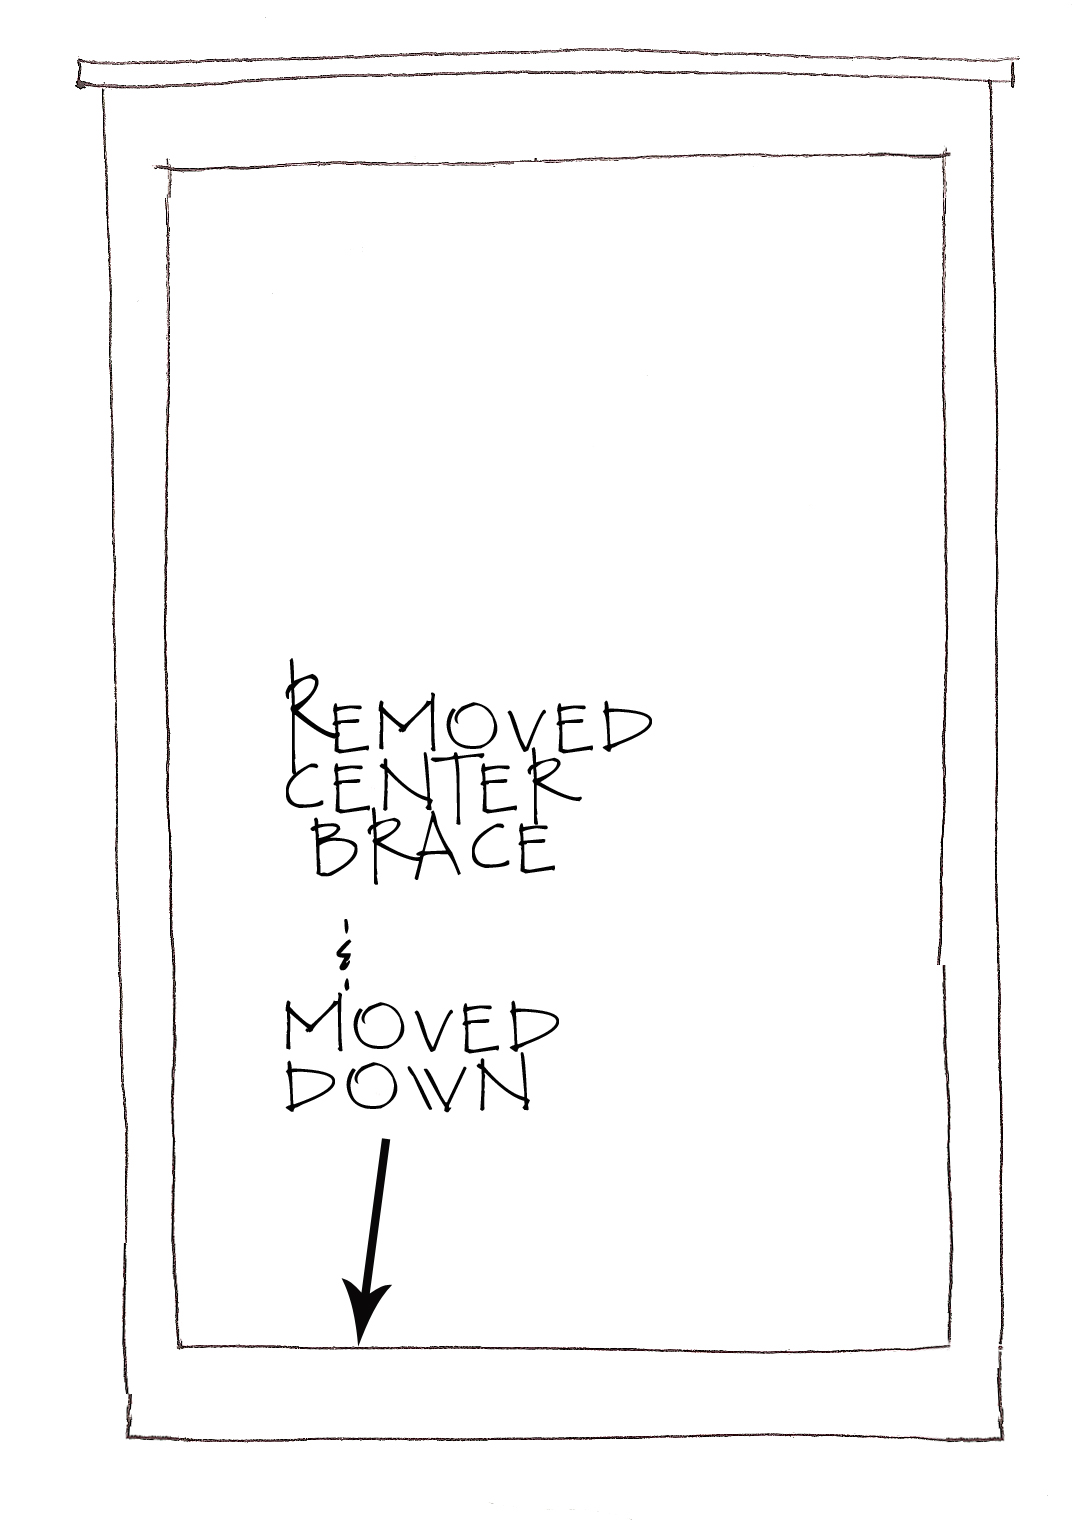
We started by removing the doors, hammering out the fixed drawer and removing the skirt and were left with just a plain face frame
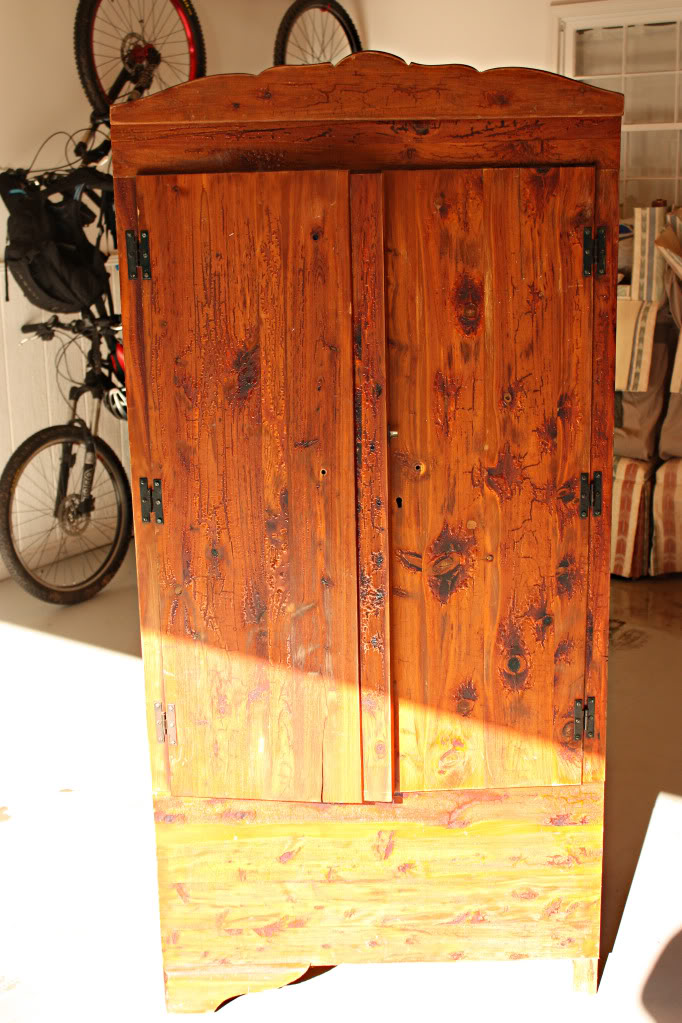
We took a sawzall and cut out the middle rail. Then, because we could we also moved the bottom rail down to the very bottom of the armoire. We resecured it all together. Luckily the piece was sturdy and built well. It was not a cheap piece of cardboard furniture! After we had finished those changes, this is what we had.
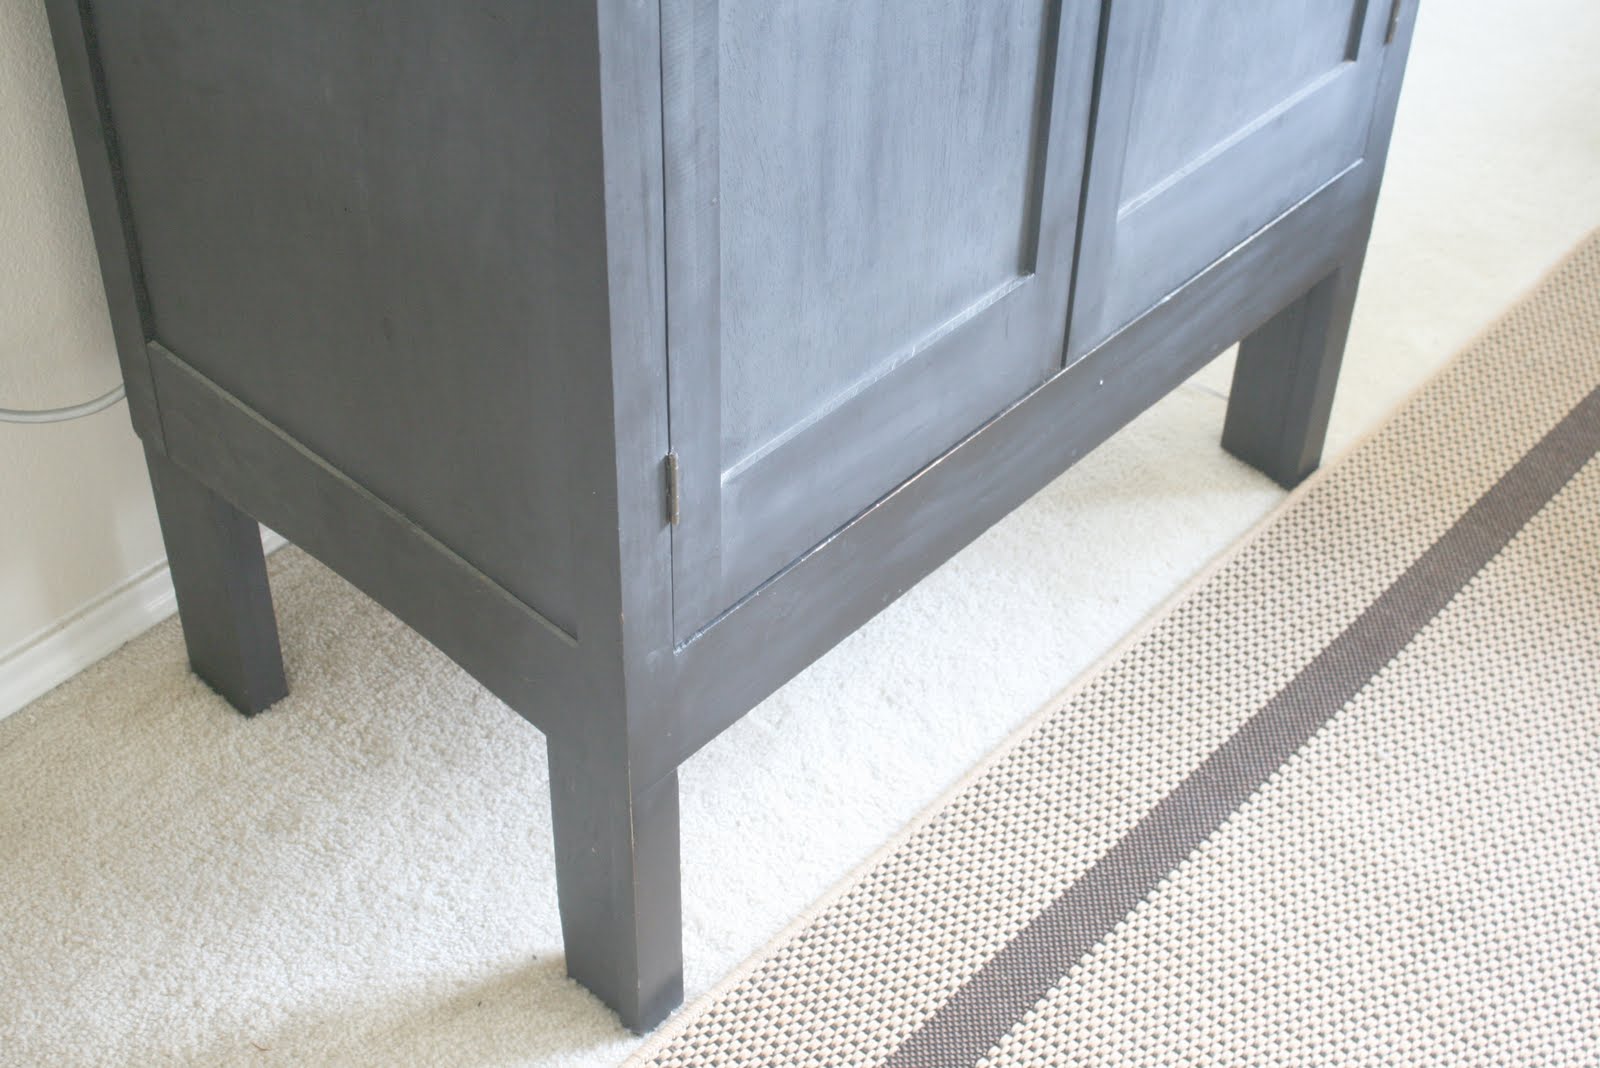
At this point it seemed really stumpy and short. So we decided to add some legs. This was a bit tricky, and I must say that unless you have a good understanding of furniture building I would not attempt this, or you may just have an armoire land on top of you like the wicked witch of the east had a house fall on her and end up losing your favorite shoes to some obnoxious teenager!
BUT, if you really fell like it needs legs, I would do what we did when changing up a cheap bookcase and build a small table with pre-built (purchased) legs and screw the table and armoire together really solidly. and make sure that the legs are right at the front, supporting the weight properly, and you may want to secure the piece to the wall. (refer back to the same post for more instructions)
Moving on, here is what the legs looked like when we were done:
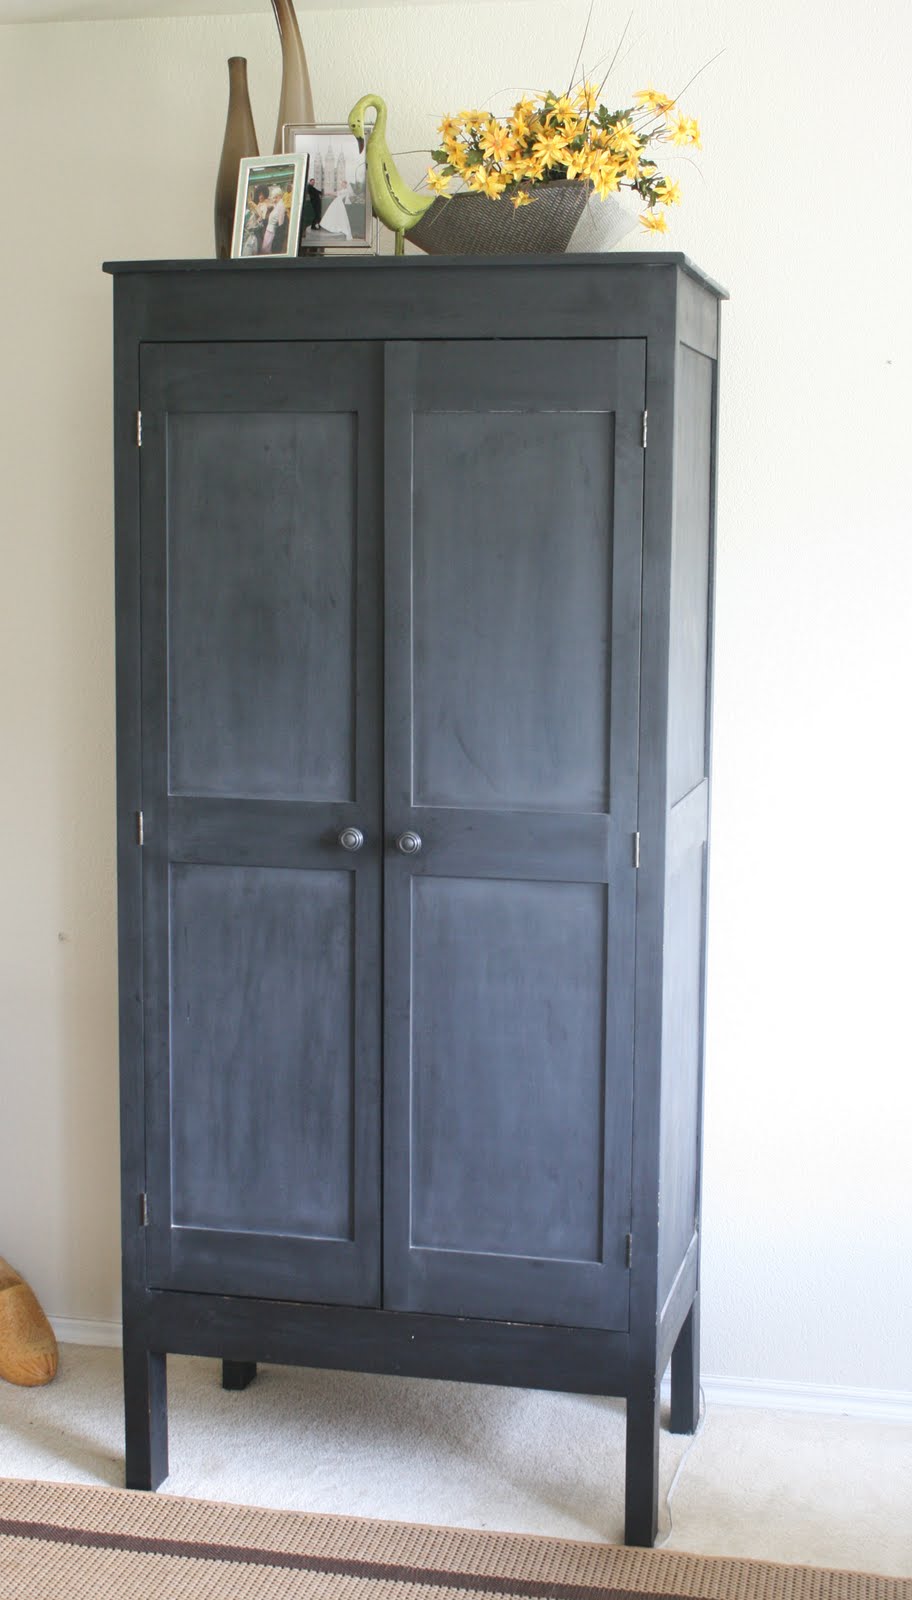
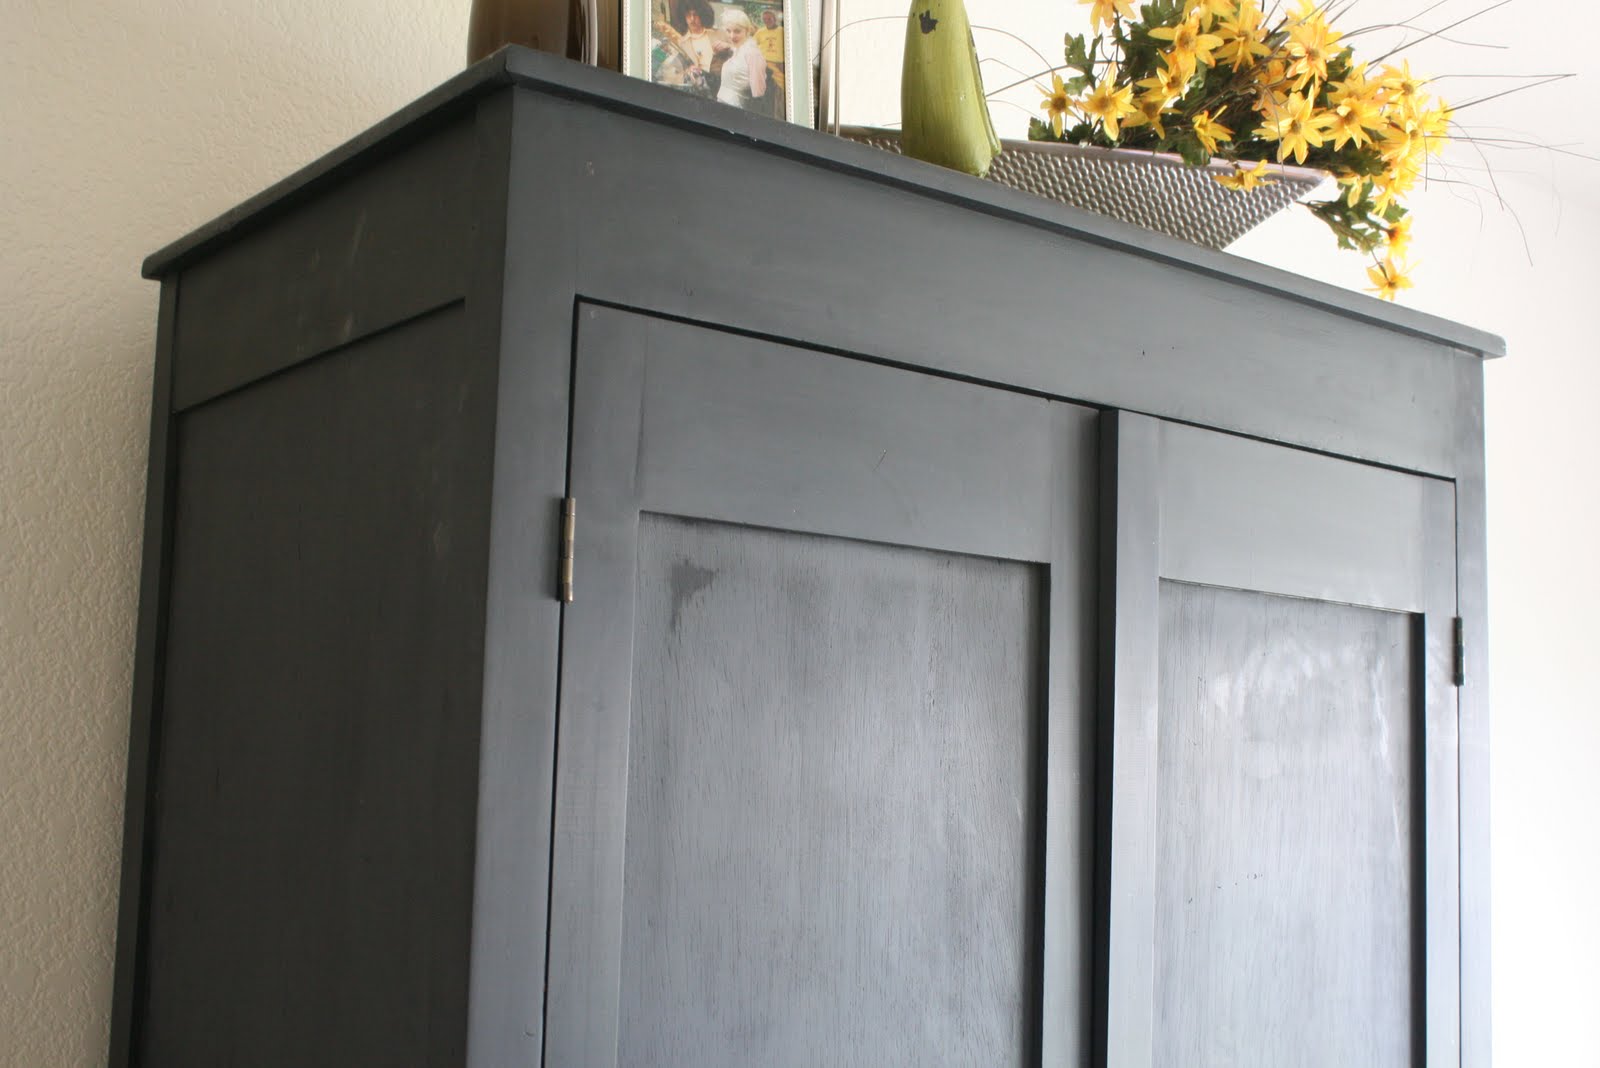
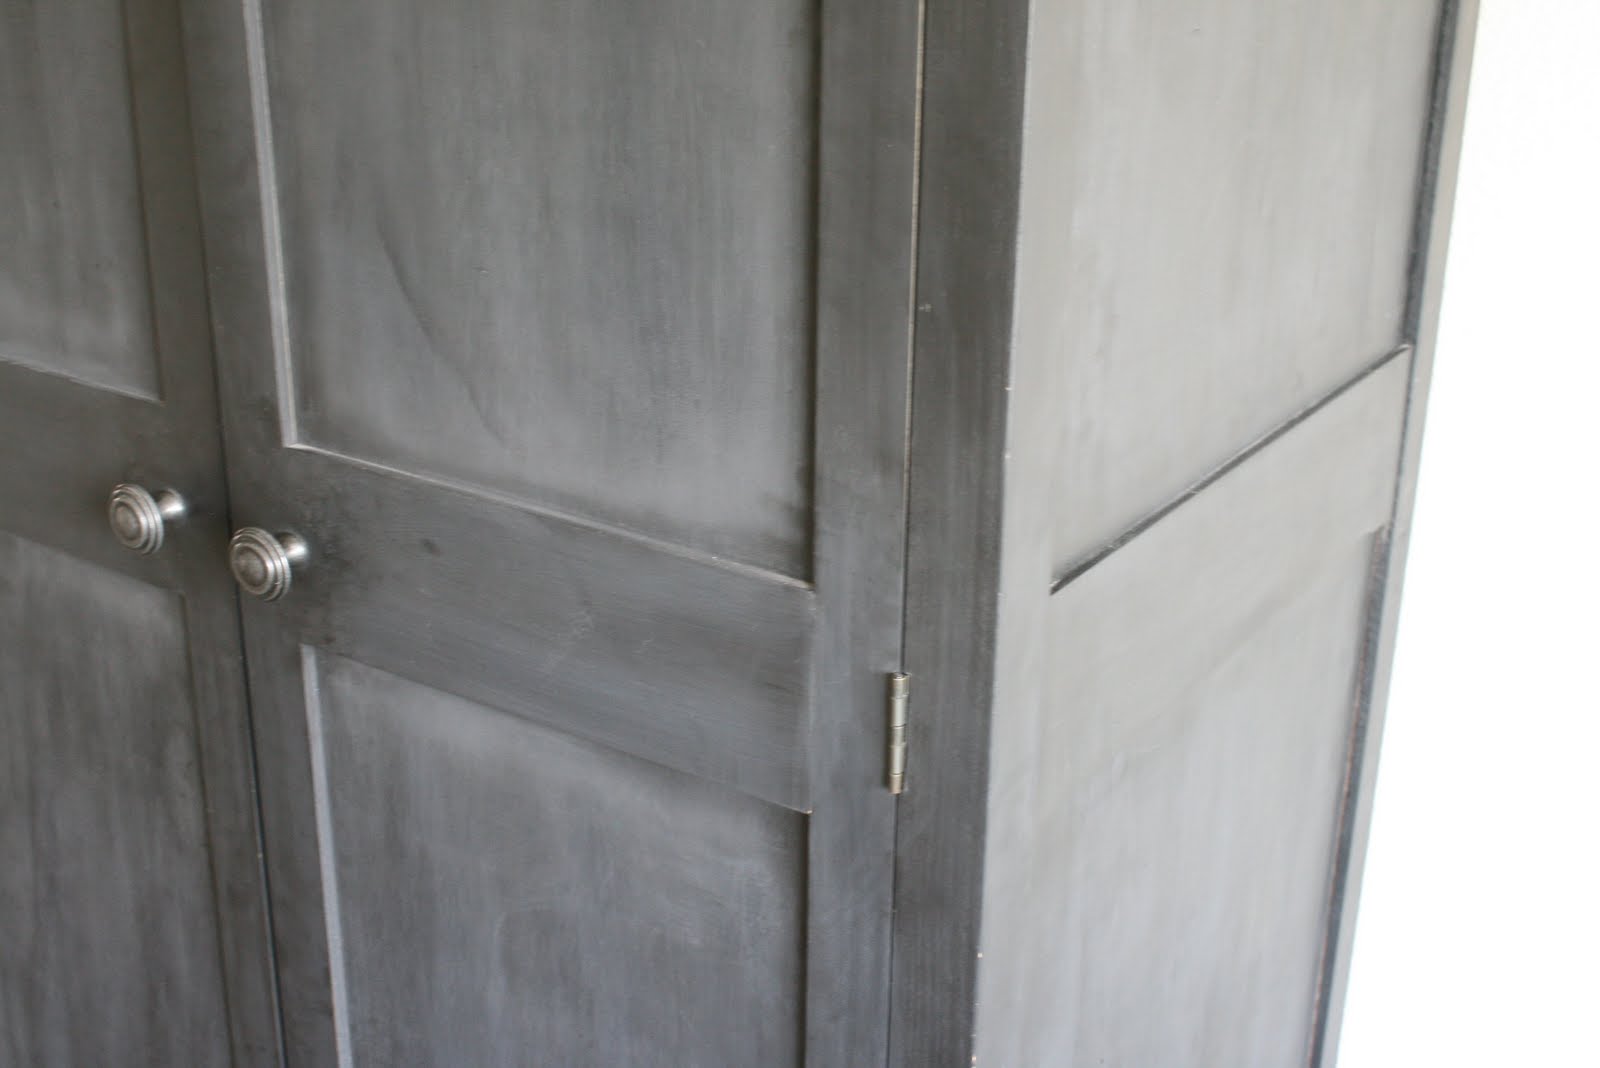
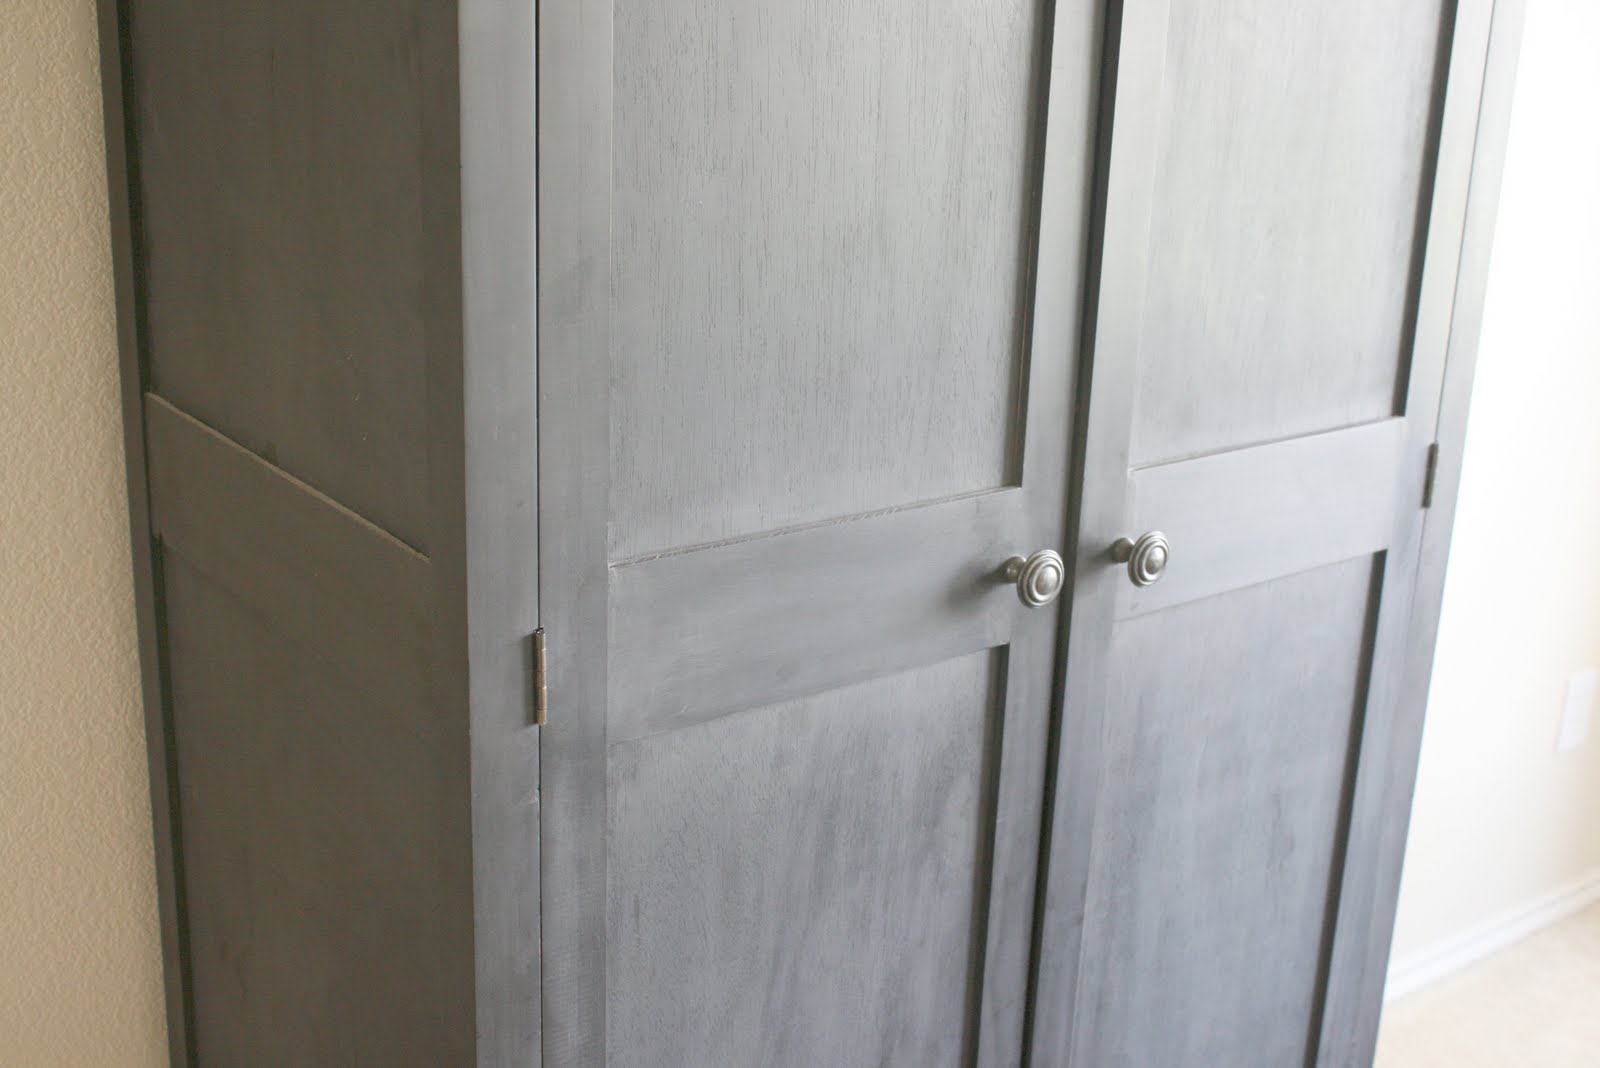
Now, at this point I wanted full lengthen doors. We worked with the existing stiles and rails of the piece and mimicked the design so they would feel proportioned properly. We decided on Shaker style doors, cuz I like the simple timeless style and they can be made with just a miter and table saw, not routers necessary.
At this point we spray painted it black. I did not want any sheen at all, so I just bought 5-6 of the .99 cent flat black spray paint. While painting we experimented with the finish, almost on accident. Between the coats, to make sure there was a buealtiful smooth finish, we sanded with a 220 foam sanding block. It actually ended up giving the paint an aged, burnished look (not distressed, i didn’t sand the corners) and I really liked it, so we even sanded the final layer of paint and I am happy with the way it turned out.
Let’s show that before one more time:
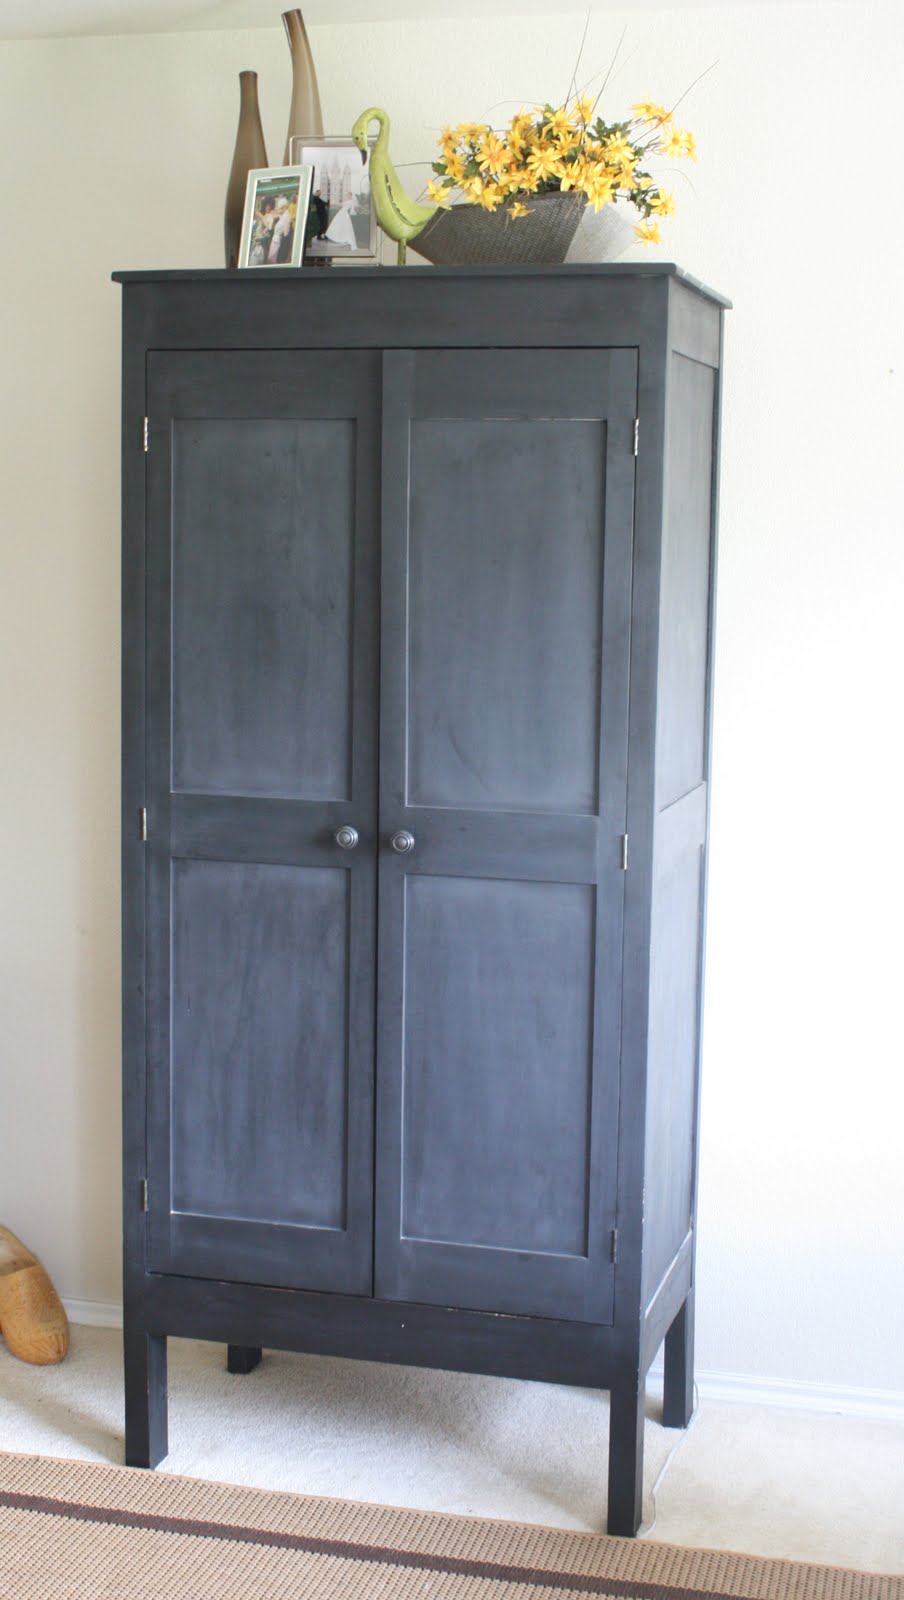
After:
I know I have a bunch of random stuff on top. Accessorizing is honestly not my thing, yet… I am trying to learn how to do it, but I am also not into a lot of “stuff/junk”. So, as soon as I actually figure out my real style I will let you know!
Cassity Kmetzsch started Remodelaholic after graduating from Utah State University with a degree in Interior Design. Remodelaholic is the place to share her love for knocking out walls, and building everything back up again to not only add function but beauty to her home. Together with her husband Justin, they have remodeled 6 homes and are working on a seventh. She is a mother of four amazing girls. Making a house a home is her favorite hobby.


>I'm featuring this today!
https://lanieree.blogspot.com/2010/06/featuring-you_11.html
>Wow, that's impressive! So great to see you again at Craft Schooling Sunday, do drop by again! All the best!
>Love it! Great transformation!
Thanks for sharing @ Anything Related!
{Rebekah}