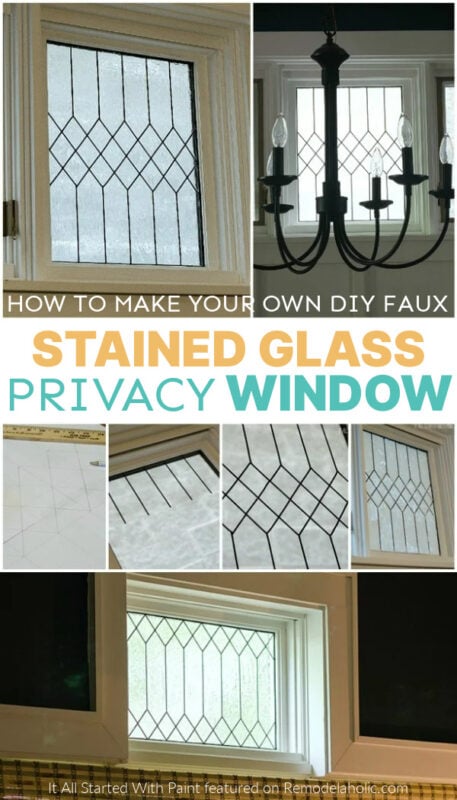
How to DIY Faux Stained Glass Windows
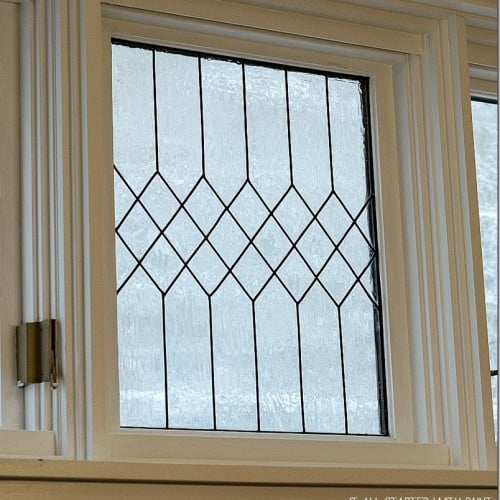
Learn how Linda turned her existing window into a faux stained glass window with easy to install leaded lines. It’s a beautiful classic design and adds privacy to a plain window, and it’s easy to make your own stained glass at home!
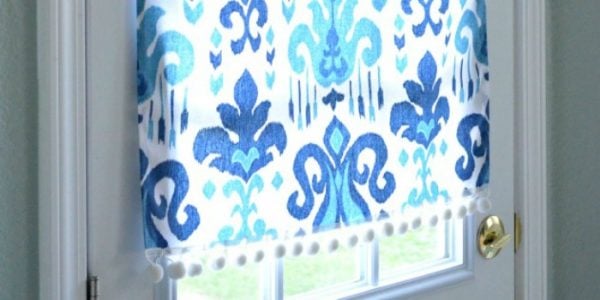
You can also add privacy with this easy DIY lace window film or this cheap DIY window film trick — plus learn how to make a no-sew DIY magnetic curtain for more window coverage.
🎨 Looking for kids art project ideas? Here are 60 Easy Art Ideas for Kids Wall Decor.
DIY Faux Stained Glass Window Tutorial
by Linda at It All Started With Paint
This post contains affiliate links. Learn more and read our full disclosure policy here.
Hi everyone! My name is Linda from It All Started With Paint and I’m thrilled to be participating in the Remodelaholic ‘All Things Windows’ event.
Before I share my faux leaded glass window project, let me share a little background about me. I’m a Jersey-born-and-bred Midwestern transplant who lives in Chicago with my husband and two children. Seventeen years ago I left a successful career in public relations to stay at home and raise my children. Since then, I’ve balanced child rearing with freelance public relations work.
Then three years ago I discovered the world of DIY and home décor blogs. I was inspired by the amazing – and affordable – transformations so many talented women (like Cassity) were making to their homes. It awakened my ‘inner Martha’ and I decided to add my voice to the blogosphere.
Since then, I’ve been chronicling my DIY, room remodel, crafting, and cooking journey on my blog, It All Started With Paint. And, just because I’m a glutton for punishment, I even started a second blog, Mason Jar Crafts Love, where I share innovative ways to craft, cook, and decorate with mason jars.
Back to my home DIY journey. Our house is over 100 years old. Don’t get too excited. It comes with none of the old world charm you might imagine a home built in the late 1800’s would possess. It does, however, come with a whole lot of old house money-pit headaches! But that’s a post for “This Old House Headaches Week” …

I pride myself on being a make lemonade out of lemons person. And when confronted with modern-looking windows and mouldings that didn’t really fit with the coastal-nautical-city-cottage vibe I’m was hoping to infuse into our home, I set about giving them a bit of old world flair. On the cheap, of course, with a faux stained glass window treatment … yes you can stain glass in an existing window!
Looking for something even easier? Grab this inexpensive privacy film for a one-step faux stained glass window.
How to DIY Faux Stained Glass Windows
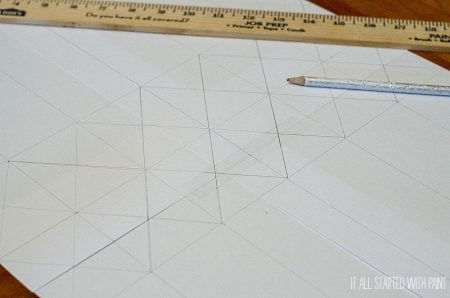
Step 1: Draw the glass design
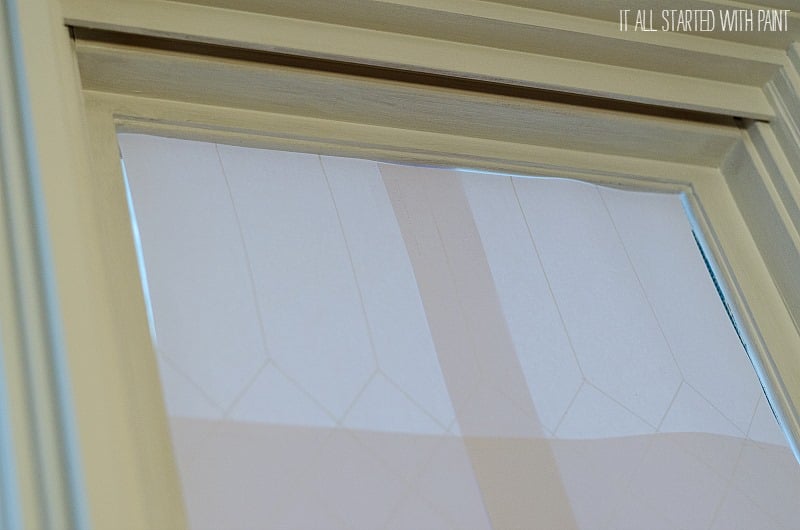
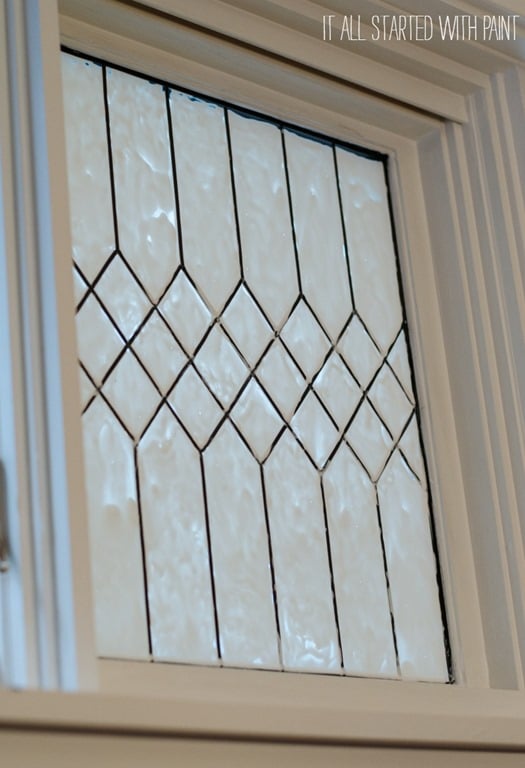
I started out drawing my faux stained glass design on a piece of paper the exact dimensions of the window opening. Needless to say, there was a lot of erasing and redrawing to get the perfect fit.
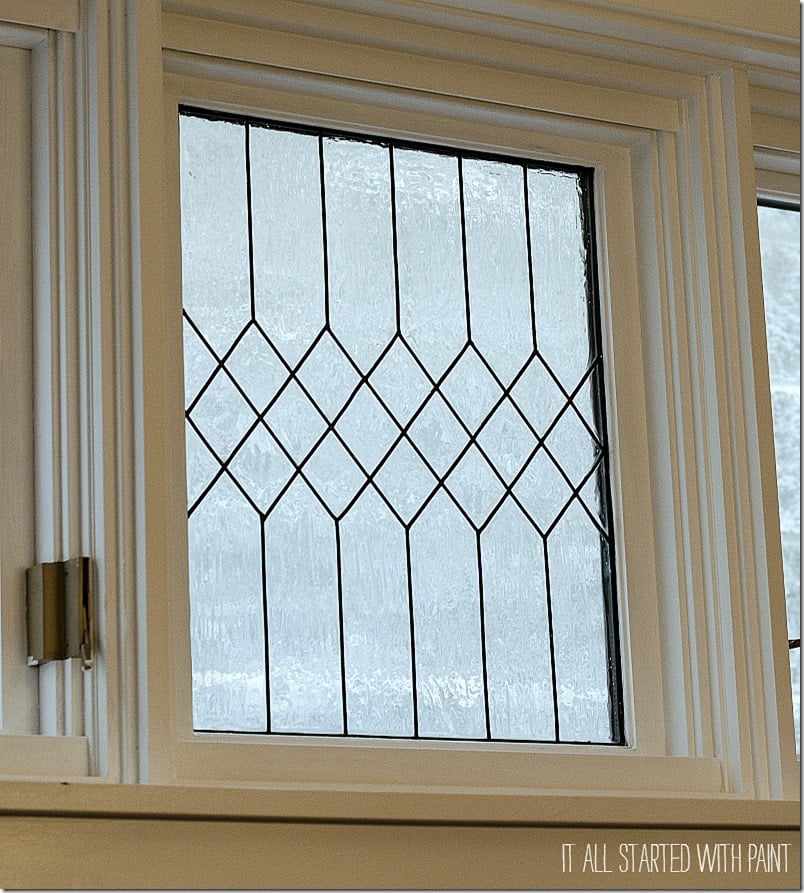
My window design is all straight lines, which made it easy to draw and easy to create using primarily the peel and stick DIY stained glass leading lines.
For more organic shapes, you could use stencils or cups, bowls, etc to make nice even curves and simple designs.

Step 2: Transfer the design to the window
Now, if I could easily reach the outside of the window, I would just tape that drawing to it with painters tape and trace the pattern right onto the glass. But that wasn’t an option. So I put my drawing up against the window and, using a pencil, lightly marked off my lead line starting points on the edges of the window frame.
PS: Be sure to clean your glass well with glass cleaner before transferring the faux stained glass black outlines!
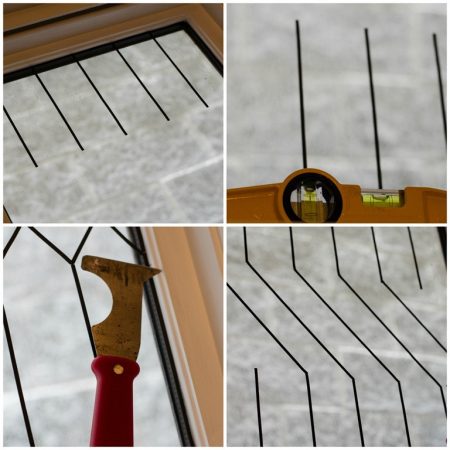
Step 3: Apply leaded glass lines
Then it was time to grab my Gallery Glass supplies, which I found at the craft store. These supplies are also available here on Amazon. I used window leading strips, liquid leading, and crystal clear window color (and there’s a combo kit here).

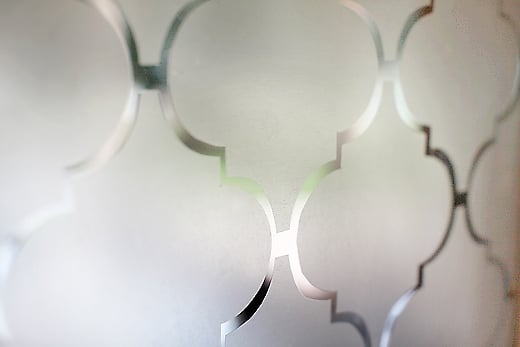
I used the clear window coloring to add a frosted glass look to my stained glass window. If you’d like a more colorful stained glass window, use the colored Gallery Glass paints instead like Madigan added to her sidelights here. There are also colorful window films you could use.
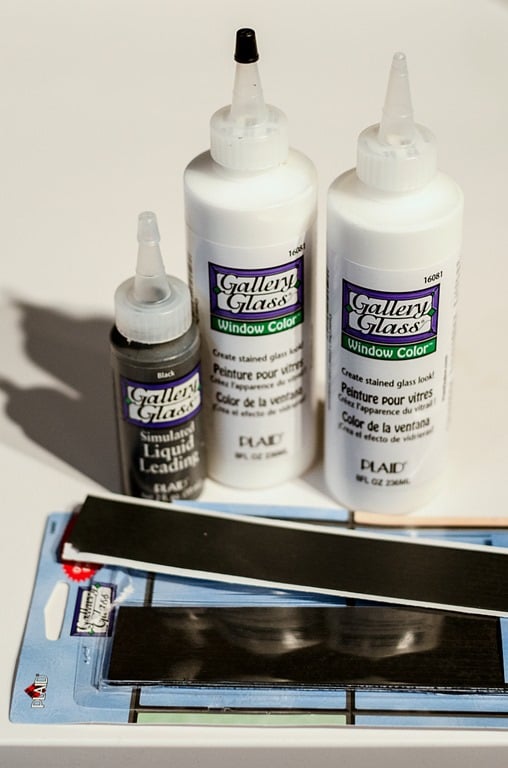
Those leading strips are pure genius. You can easily cut them. Easily reposition them to follow the lines of your pattern. I just used a level to keep my vertical lines straight. Press firmly on the edge of the lead strips to ensure good adhesion.
Related: DIY Lace Window Film. It’s easier than you think!
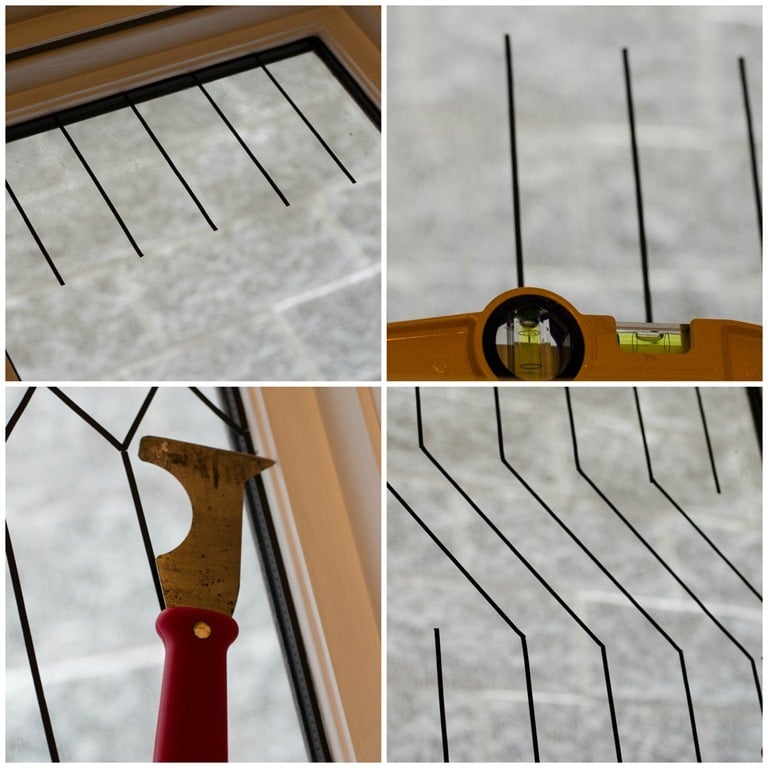
The I added some liquid leading “solder” to clean up the leaded areas where pieces didn’t quite connect. This is basically fancy black acrylic paint.
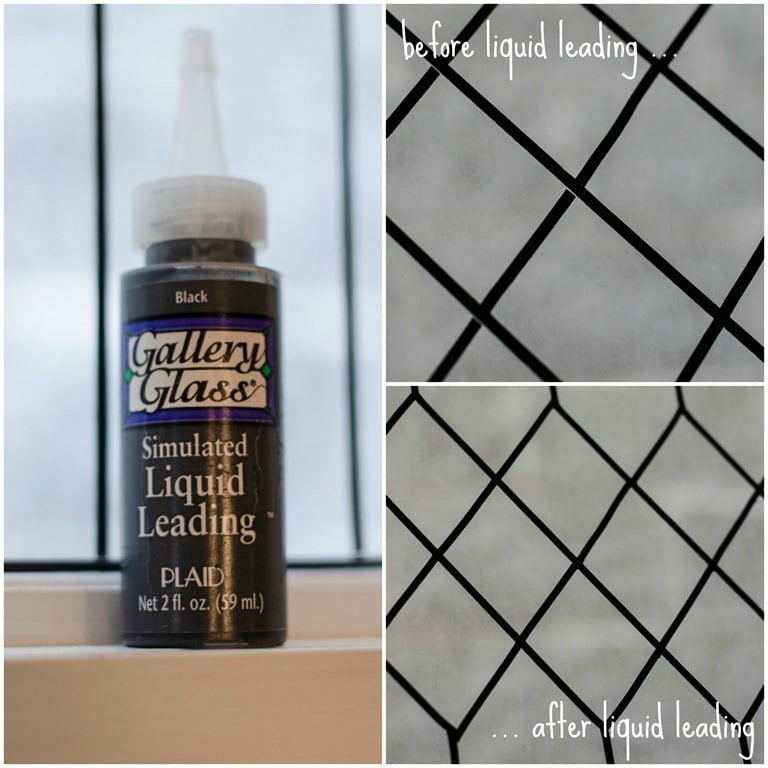
I let that dry for 8-10 hours, per the instructions on the bottle.
For curved lines, circles, or other organic shapes that aren’t straight lines, Gallery Glass recommends creating a DIY stained glass window cling. You’ll use a spare piece of glass (like from a picture frame), place the pattern underneath, apply the liquid leading and the stained glass paint, then let it dry and peel it from the glass to place on the window.
Step 4: Apply stained glass color paint
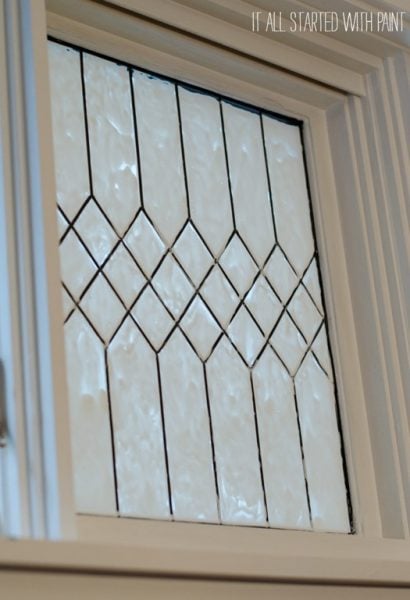
Phase two was the application of the Crystal Clear glass color. Which, obviously, is colorless. After it dries, that is. During application it was milky white.
The colorful DIY stained glass window paint applies the same way — opaque during application and translucent after it dries (kind of like Mod Podge or Elmer’s glue).
I was a bit heavy handed. Squeezing it out directly from the bottle onto the window. Completely forgetting about the effects of gravity. There was some revisiting throughout the day to wipe away the Crystal Clear from the lead lines and the bottom of the window pane.
My recommendation is to skip my heavy-handed method and use some type of applicator. Like a paintbrush. And painting on multiple light coats until you reach your desired look.
Gallery Glass recommends applying the DIY stained glass window paint directly to the window from the bottle, then using this pick tool to brush/stir to spread and blend the paint. This also helps remove air bubbles trapped beneath the paint.
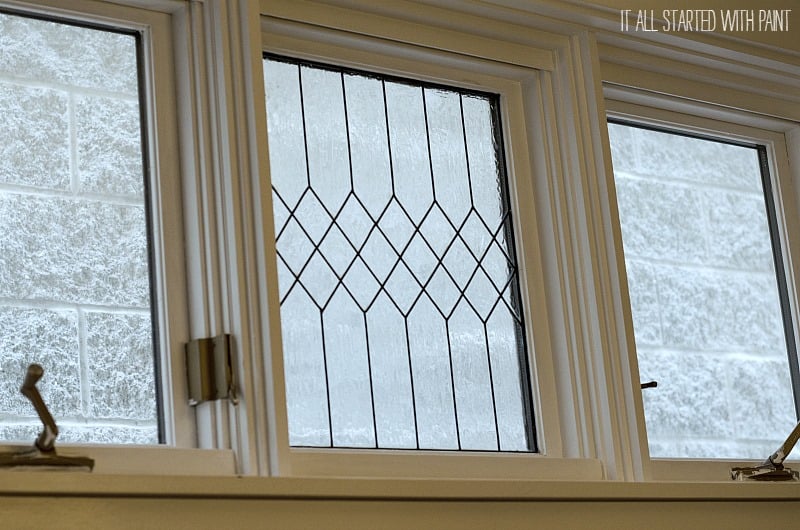
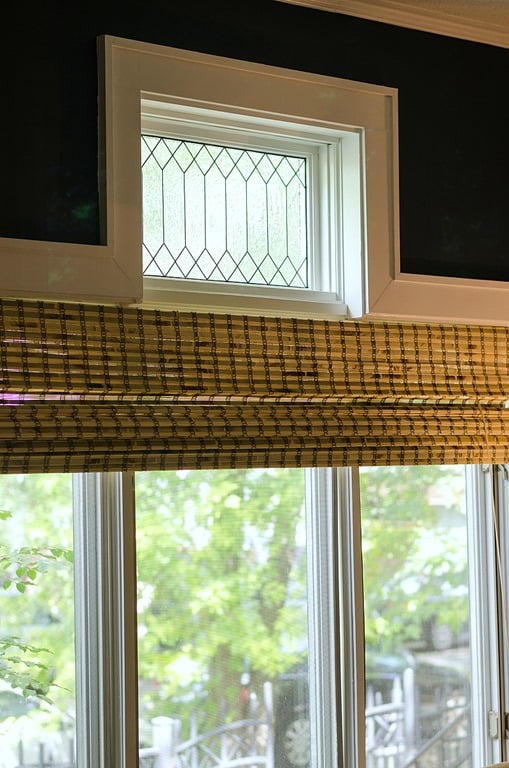
In the end, I’m really happy with how it turned out.
It really does compliment my dining room remodel.
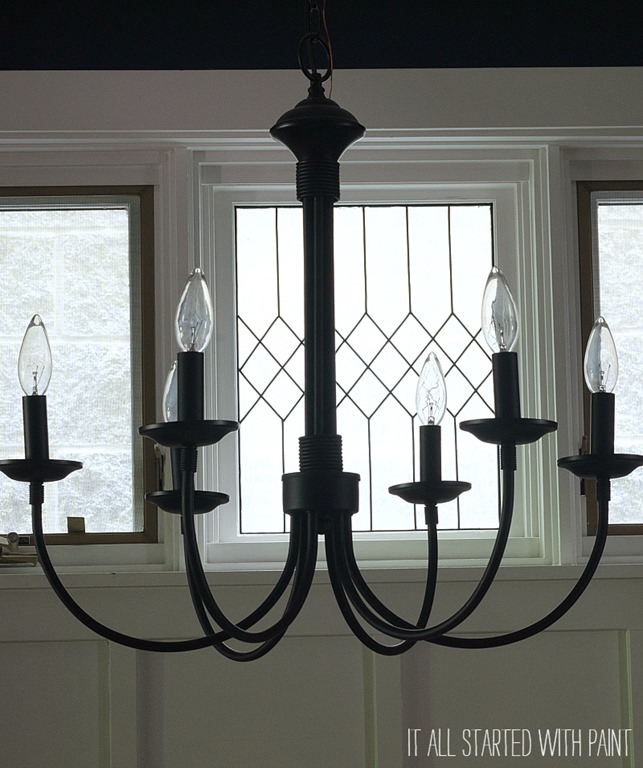
In fact, I loved it so much that I created one in my living room as well.
You can see my fully remodeled coastal-nautical-city-cottage-look dining room and living rooms (complete with faux leaded glass windows) — as well as the faux stained glass window I created in my entryway during my pre-blogging days — by visiting the room remodels section on my blog.

Thank you so much Cassity for inviting me to share my faux stained glass window tutorial with your Remodelaholic readers! Hopefully they’re inspired to add a bit of old world house charm to their very own homes – without the old house money-pit headaches!


You can also find me on social media, including Facebook, Pinterest, and Twitter. I’d love for you to stop by and socialize!
More DIY Privacy window ideas
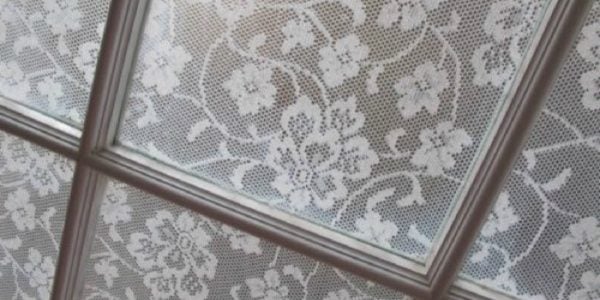
Lace DIY Window Film


DIY Stained Glass Window FAQs
Is DIY stained glass expensive?
Faux stained glass is not expensive and it’s a very affordable way to create your own privacy window and add some classic style to your home. A pack of leading strips and a combo kit of liquid leading and glass paint cost less than $50 (and you can use coupons at most craft stores!) and will cover several average size windows, depending on your design.
Is this DIY faux stained glass window paint removeable?
Yes! The paint is very durable but can also be removed if you’d like to return to the flat glass window. Just use a glass scraper tool or craft blade/utility knife to score the edges, then carefully scrape up the paint — it may even peel off in one piece.
How do I clean a faux stained glass window?
Since the stained glass paint and leading are applied to the inside of the window only, you can continue to clean the exterior of the window like usual. For the textured inside of the window, wipe clean regularly with a lint-free microfiber cloth to remove dust.
Can I use this method for a kids glass window art lesson?
Of course! The Gallery Glass supplies are a great option for kids and adults alike to create your own imitation stained glass art and stain your own “window” in a photo frame or any sheet of glass. (We love art history!)
If you’re on a budget, you can replace the liquid leading with black glue (colored with paint) to trace the pattern or silhouette on transparency film sheets instead of glass. Add food coloring or a couple drops of acrylic paint to a few tablespoons of clear glue, white school glue, or Mod Podge Gloss in a disposable bowl or muffin tin, then paint the colored glue in the sections you’d like.
Can I use window film to look like stained glass?
Yes! If you’re looking for a quick install, there are many beautiful privacy window films that look like stained glass, plus other beautiful designs. Here are a few of our favorites:
This post is part of our All Things Windows series. See all our DIY window ideas and tutorials here.


How to DIY Faux Stained Glass Windows
Ingredients
- Window leading strips
- Liquid leading black
- Crystal clear window paint or colored Gallery Glass paint
Instructions
Step 1: Draw the glass design
- I started out drawing my faux stained glass design on a piece of paper the exact dimensions of the window opening. Needless to say, there was a lot of erasing and redrawing to get the perfect fit.

- My window design is all straight lines, which made it easy to draw and easy to create using primarily the peel and stick DIY stained glass leading lines.
- For more organic shapes, you could use stencils or cups, bowls, etc to make nice even curves and simple designs.
Step 2: Transfer the design to the window
- Now, if I could easily reach the outside of the window, I would just tape that drawing to it with painters tape and trace the pattern right onto the glass. But that wasn’t an option. So I put my drawing up against the window and, using a pencil, lightly marked off my lead line starting points on the edges of the window frame.
- PS: Be sure to clean your glass well with glass cleaner before transferring the faux stained glass black outlines!
Step 3: Apply leaded glass lines
- Then it was time to grab my Gallery Glass supplies, which I found at the craft store. These supplies are also available on Amazon. I used window leading strips, liquid leading, and crystal clear window color (and there’s a combo kit).
- I used the clear window coloring to add a frosted glass look to my stained glass window. If you’d like a more colorful stained glass window, use the colored Gallery Glass paints instead. There are also colorful window films you could use.
- Those leading strips are pure genius. You can easily cut them. Easily reposition them to follow the lines of your pattern. I just used a level to keep my vertical lines straight. Press firmly on the edge of the lead strips to ensure good adhesion.

- Then I added some liquid leading “solder” to clean up the leaded areas where pieces didn’t quite connect. This is basically fancy black acrylic paint.
- I let that dry for 8-10 hours, per the instructions on the bottle.
- For curved lines, circles, or other organic shapes that aren’t straight lines, Gallery Glass recommends creating a DIY stained glass window cling. You’ll use a spare piece of glass (like from a picture frame), place the pattern underneath, apply the liquid leading and the stained glass paint, then let it dry and peel it from the glass to place on the window.

Step 4: Apply stained glass color paint
- Phase two was the application of the Crystal Clear glass color. Which, obviously, is colorless. After it dries, that is. During application it was milky white.

- The colorful DIY stained glass window paint applies the same way — opaque during application and translucent after it dries (kind of like Mod Podge or Elmer’s glue).
- I was a bit heavy handed. Squeezing it out directly from the bottle onto the window. Completely forgetting about the effects of gravity. There was some revisiting throughout the day to wipe away the Crystal Clear from the lead lines and the bottom of the window pane.
- My recommendation is to skip my heavy-handed method and use some type of applicator. Like a paintbrush. And painting on multiple light coats until you reach your desired look.
- Gallery Glass recommends applying the DIY stained glass window paint directly to the window from the bottle, then using this pick tool to brush/stir to spread and blend the paint. This also helps remove air bubbles trapped beneath the paint.
- Let it dry and enjoy your new stained glass window!
Lorene has been behind the scenes here at Remodelaholic for more than a decade! She believes that planning projects and actually completing them are two different hobbies, but that doesn't stop her from planning at least a dozen projects at any given time. She spends her free time creating memories with her husband and 5 kids, traveling as far as she can afford, and partaking of books in any form available.


Wow, that window is amazing. It looks fabulous.
I love this! We also have a house built before 1900. But somebody had decided in the 1950’s to update some things then again in the 1980’s. I have a bathroom that has a large window next to the toilet (why would anybody do this I have no idea)! Can this hold up to steam and moisture that gets on the window?
Genius! Love this idea
I love this so much! However, I’m confused as to why you used the clear glass color? Why do you need to apply it, if it is clear? what difference does it make?
I had the same question. Was the window already frosted before adding the lead? And what does the clear glass coating do?
It makes it appear to be frosty wavy glass
I need this for some privacy in my bathroom. It looks like it dried to a sort of frosted, milky white, but others that I’ve seen that used the crystal clear, it’s dried very clear (but leaded and old looking). I’d prefer the milky for some added privacy … how did you achieve that?
I am a renter. Is this easily removed?
Did you do the beading on both sides of the window? If only on one side, is the difference noticeable?
I have two large narrow windows next to my front door, the adhesive frosting is starting to peel and I’m planning a project like this with a Charles Rennie Mackintosh style design.
What I did want to also do though is paint it onto perspex that’s cut to fit those windows perfectly. There’s a place near me that will precise-cut the dimensions, then at least if I make a mistake or it doesn’t look as perfect as I’d like, I’ve not permanently damaged one of the more publicly visible parts of my house
Wow, that looks fabulous! How much does it block the view into / out of the house? I’m looking to do this in my dining room, my neighbor’s window is about 6 feet away! I can watch TV with them when I sit down to dinner!
Thanks for any information you can share. Enjoy those kids, they grow too fast.