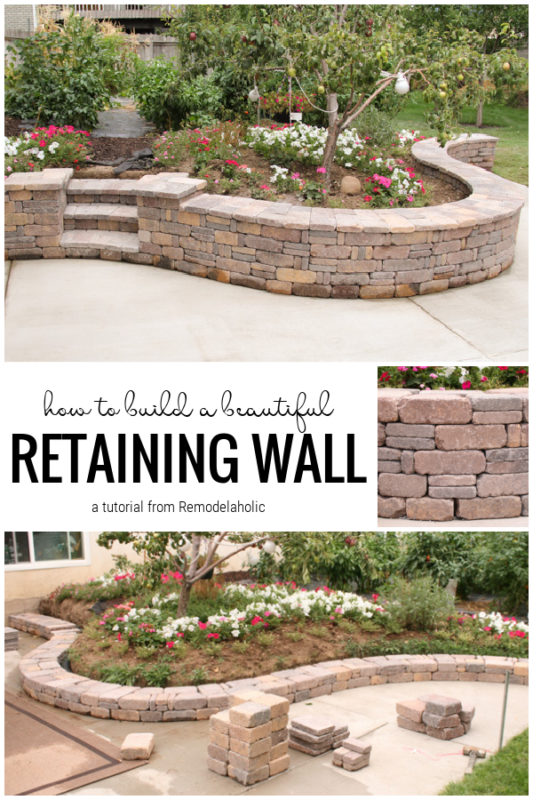
How to Build a Retaining Wall with a Top Cap and Steps
Come see how to build a retaining wall. Our beautifully curved retaining wall features a top cap to make it more comfortable for sitting, steps for access to the garden, and a buried drain pipe for water runoff, plus a tip on how to keep spiders from moving in.
Finish the space with a DIY fire pit, a DIY patio table with built-in drink coolers, and some outdoor patio lights.
How to Build a Retaining Wall
using RumbleStone Rustic Building Blocks by Pavestone
We worked in partnership with Pavestone on this project. All opinions are my own. This post contains affiliate links. Read our full disclosure policy here.
Designing our small backyard for certain purposes made the yard feel bigger and made it much more usable! We strongly suggest you draw out a final plan for your yard so that you will love it as much as we love ours!
Here’s our sketch of the entire back yard plan:
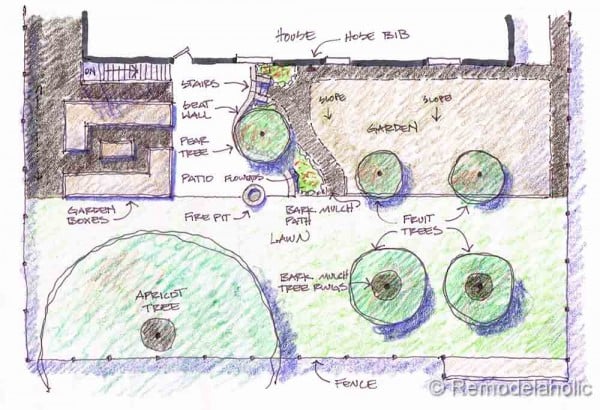
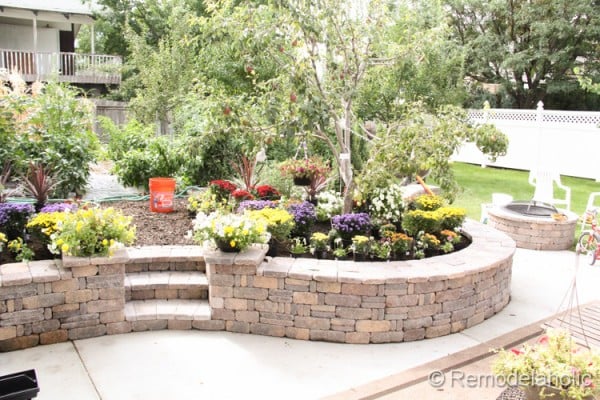
In the design, the retaining wall is right in the middle, wrapping around an existing pear tree with a fire pit nearby. These are two of the main architectural elements that we will see out our kitchen window. The fire pit is laid out to be centered to the existing pear tree and the window of the house.
As we worked on the patio project, I started to do some research on how to build a retaining wall we would love.
I wanted a stone wall and I found RumbleStone outdoor building blocks by Pavestone, and it was exactly the beautiful look I was after!
A major selling point was that I would be able to build the raised garden bed to the shape of my design and have a matching fire pit to go with it. Perfect!
How to Build a Retaining Wall: Materials
The dimensions of our retaining wall are
- 48 square face feet (meaning the front of the wall that is exposed)
- 32 feet long
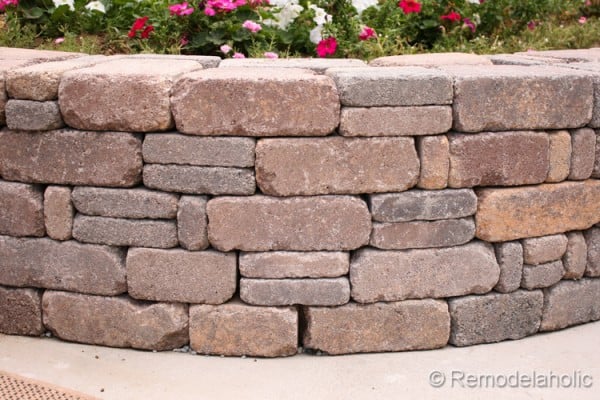
- 19 inches high (including the cap)
- 14″ wide
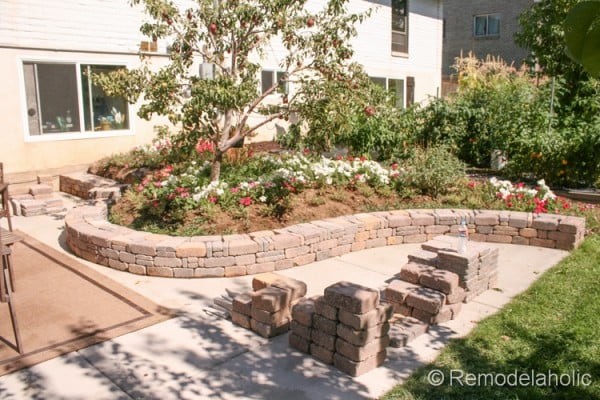
The wall has three curves and has a small set of three steps that take you up to the bigger garden area. This required:
- (5) Pallets of RumbleStone Block – Sierra Blend Color – I used a total of five different block sizes and types: three different rectangle sizes, squares, and trapezoids.
- (15) Construction Adhesive (30 oz. bottles) – For bonding the blocks together to prevent movement.
Because I was building a 19″ high wall that will double as a bench for seating and because it will hold some soil pressure on the back side, I needed to keep the water from flowing through the wall. I installed a drain pipe as well, which required:
- (30′) of 3″ Drain Pipe – Drains water away from the wall at the base.
- (1) cubic yard of Gravel – For back filling over the top of the drain pipe.
How to build a Retaining Wall: Tools
- Paver Saw – Rented from The Home Depot – $65 a day – To cut 3 1/2″ thick block.
- Large Caulking Gun – For the bigger construction adhesive bottles.
- Hand Broom – Sweeping off gravel after filling gaps.
- Floor Broom – Cleaning up the gravel.
- Wheelbarrow – Hauling the blocks to the site.
- Shovel – Moving the gravel
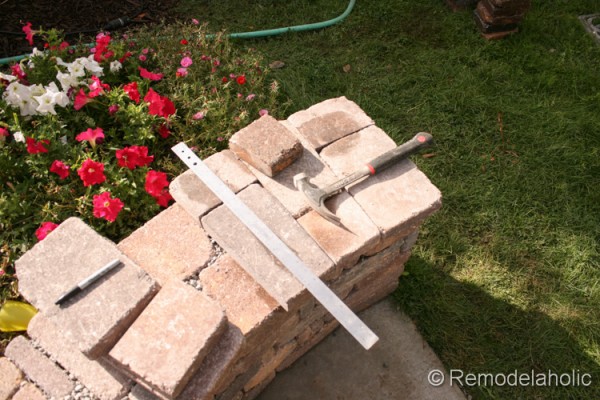
- Metal Straight Edge – marking lines for cutting blocks
- Wax Pencil – marking lines for cutting blocks
- Tape Measure – measuring the cuts
How to Build a Retaining Wall: Step by Step Process
1. Prep the base
When I poured the patio, I made sure that I added rebar to the concrete on the edges, to give it extra strength to hold the additional weight of the wall. This gave me the perfect flat surface to glue the block wall to.
If you are installing the wall on a different surface, follow the installation instructions from Pavestone to prep the base.
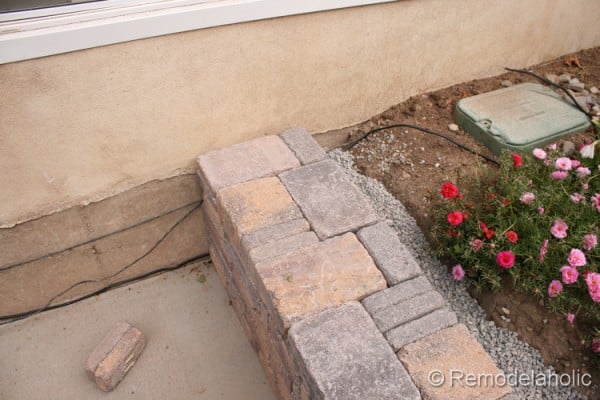
2. Drain pipe and base layer of blocks
Before I started laying the block in place I connected the drain pipe and laid it next to the concrete patio where I had cut out the soil to fit the pipe.
This is where the drain pipe starts at the house and works its way to the lawn. (Picture taken after a few layers of the wall were down, sorry!)
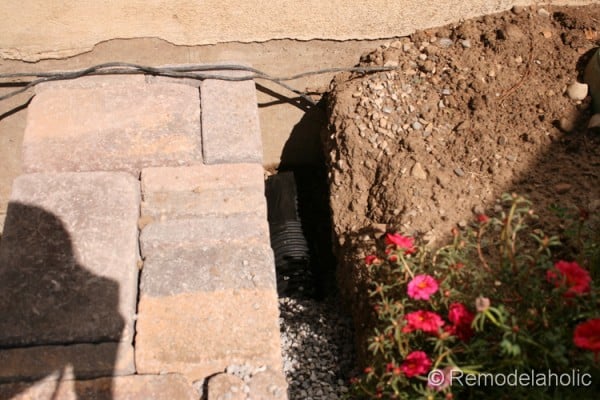
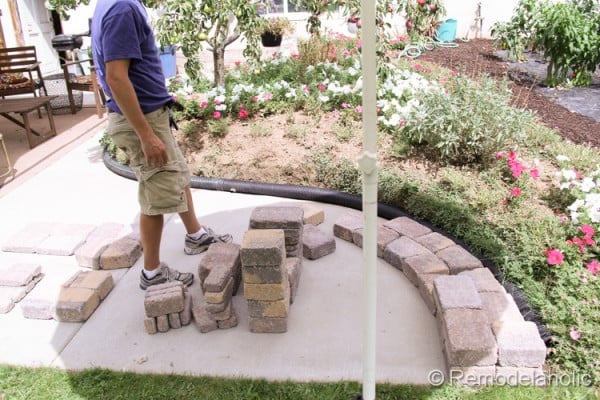
Then I started off with the base layer of trapezoids, squares and large rectangles.
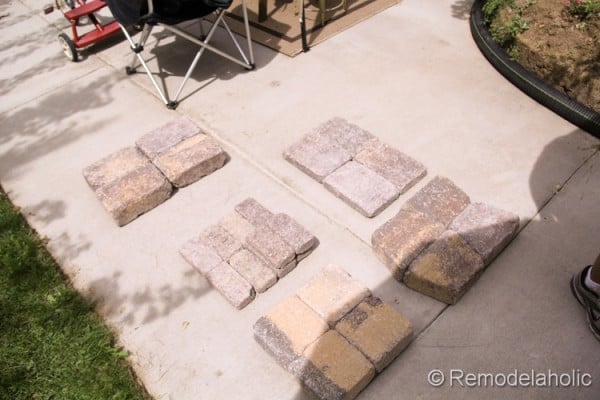
Once I laid out the first layer, I checked that the wall shape looked good and I made sure that the radius of the curves were as true as I could (using a central point and a string to curve it out perfectly).
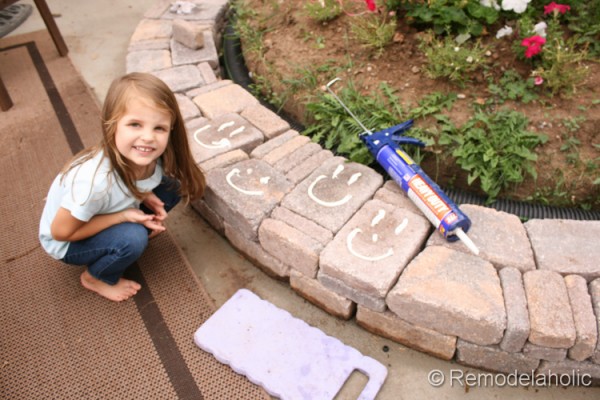
I chose to use all larger blocks to give the retaining wall a very solid base. I then applied a good amount of construction adhesive to each block and flipped it over in place.
(Smiley faces are not required, but were appreciated by my little girls. Also, this picture was taken a few rows into the project!)
3. Let the base cure, then get to work!
After the base was glued down and cured for a couple of days. I worked on the next layer. The entire wall took me about three weeks to do by myself.
I worked on it when I could, about 2-4 hours at a time for the most part. I was okay with that. It gave me time to get it done just the way I wanted it.
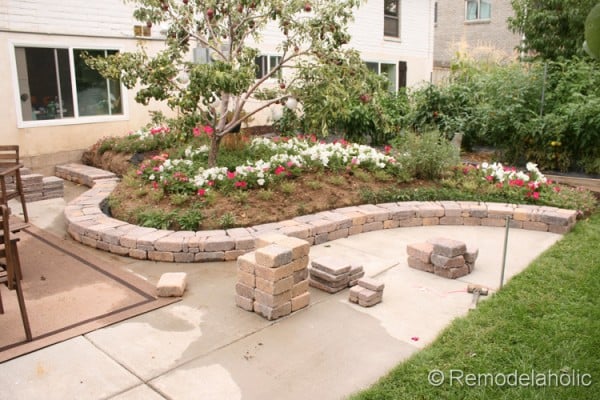
With a few layers down, you can see how I used alternating block shapes to keep the joints from lining up between each layer of block. This makes it stronger and it looks a lot better.
I also tried not to create a repeated pattern, but randomly alternated how the little blocks were placed in each layer.
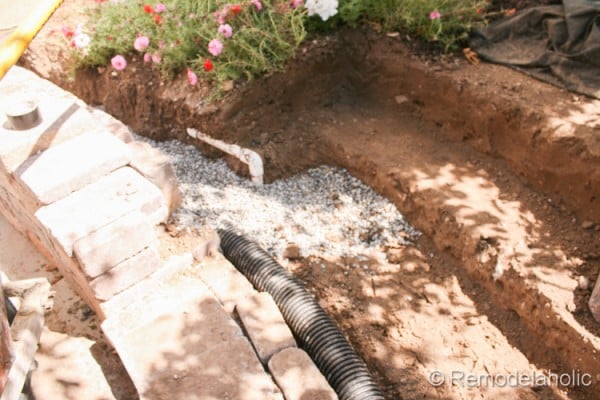
4. Back-fill with gravel
When the retaining wall gets tall enough, back-fill the gravel over the drain pipe.
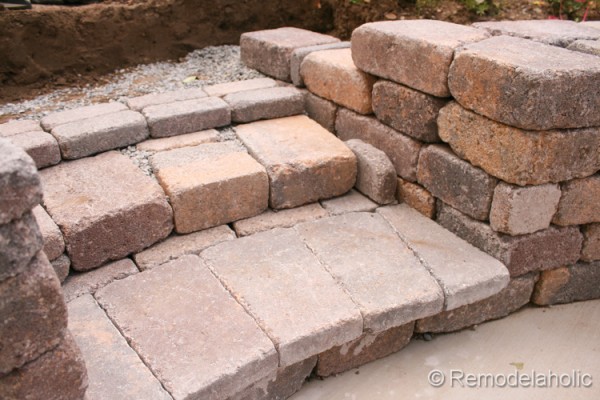
5. Stairs
The stairs were a little tricky. I decided to keep the drain pipe going under the first step. I had to make sure that the slope of the pipe would remain so it would still drain water. Luckily it did and I was able to hide the pipe under the second stair with no problem.
I cut back the soil where the stairs would go up, taking out a little extra for room to work. After that I poured in a 2″ layer of gravel for the base of the block to sit on. This way I was able to level it perfectly.
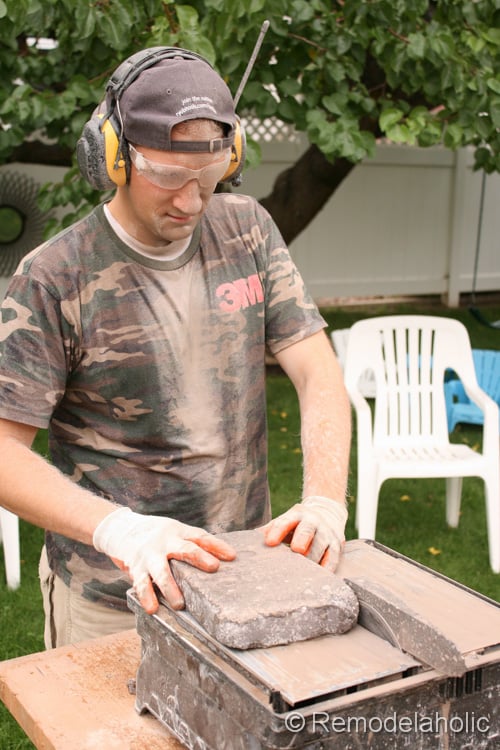
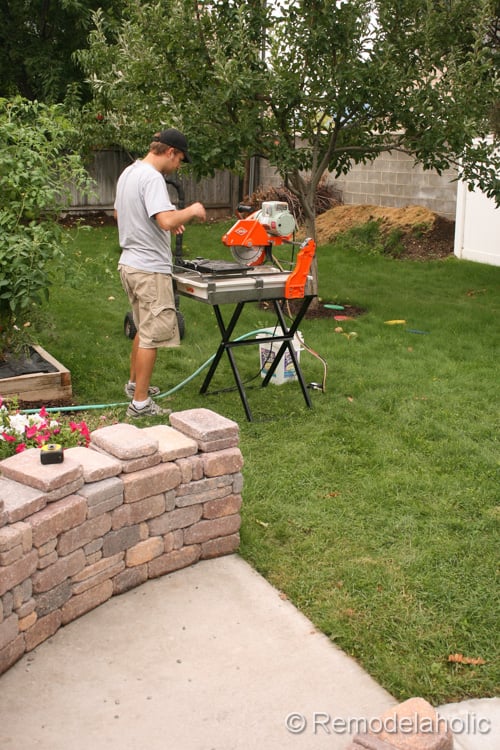
I decided to try and use our trusty little tile saw to cut the top of the stairs to the right shape.
They are 1 1/2″ thick, twice as thick as my little saw could handle. In order to cut it all the way through, I had to cut one side then flip it over and cut the other side.
I had to cut the block without the guard and this is what happened. It sprayed all over me. Cassity thought that it looked SO funny and had to take a picture of it. 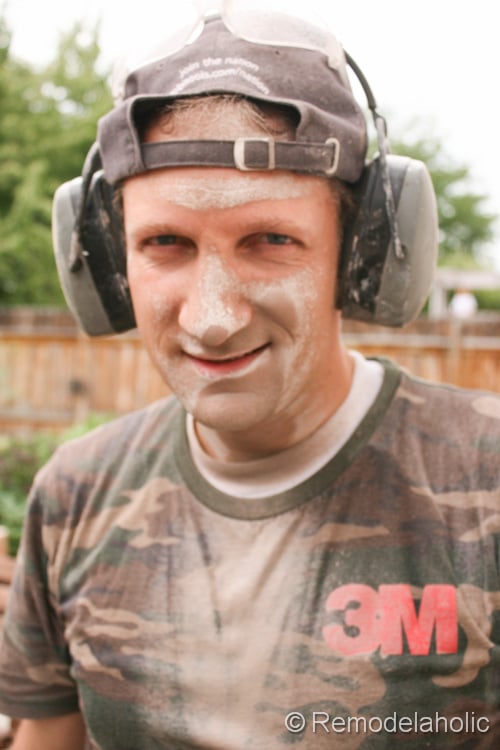
It took me 4 hours to get the first step blocks cut to shape. That was way too long. I went out and rented a bigger saw!
Here are some progress shots of the steps going in.

Here they are all cut and in place.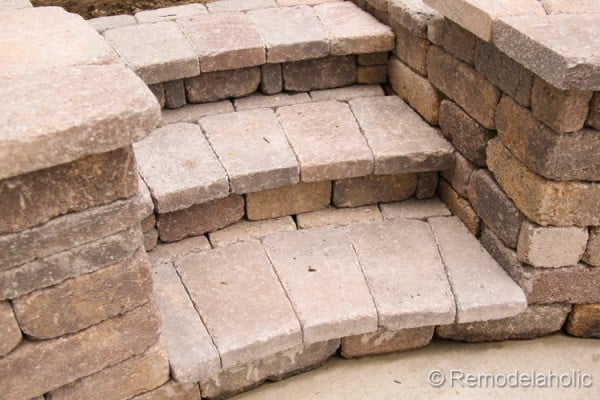
6. Continue with the layers
Using the same process as before, build on layers. Stop when you’ve reached your desired height.
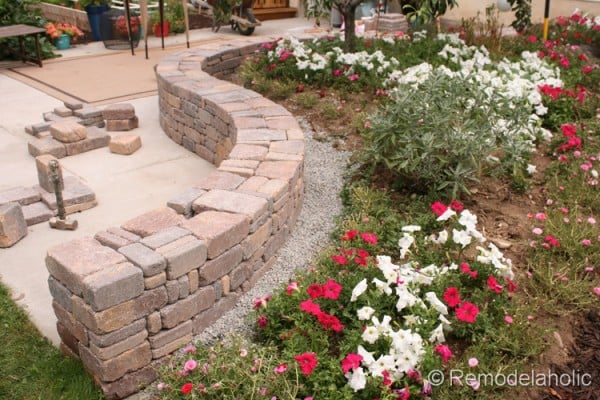
Near the end of the wall, I had to make sure the front AND back of the wall looked good. Due to the slope of the flower garden area, both sides of the wall will be seen here. I like how it turned out!
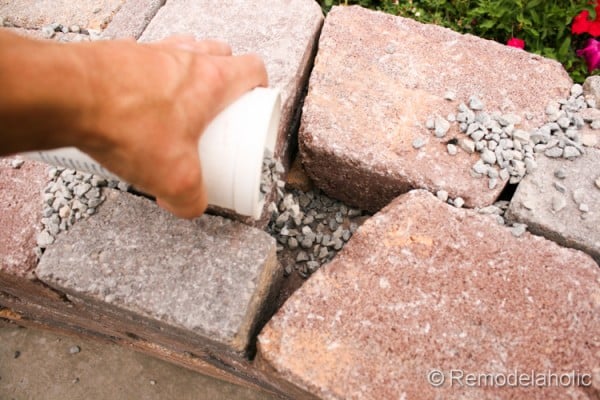
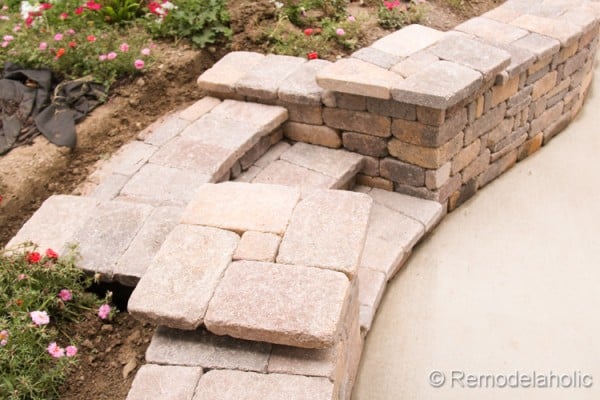
7. Keep out the spiders!
Because of the curved design, there were gaps left between the trapezoid pieces. Cassity had a great idea to fill the holes with the gravel to help prevent spiders from moving in. The last thing she wanted was to sit on the nice new wall and have a spider crawl out! I actually found three black widow spiders that had moved in just after a few days of building the wall. Thanks, honey, for the great idea to keep them out!
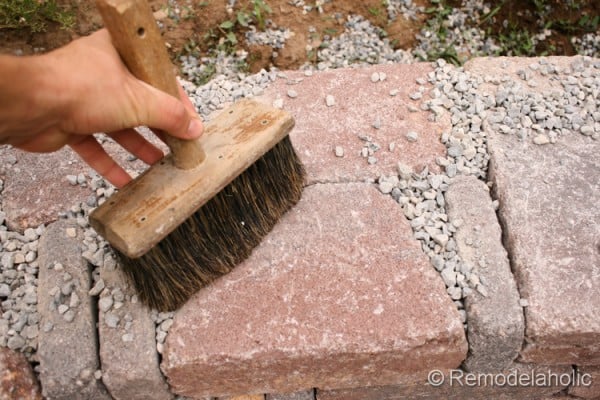
We used a cup to transport a bit of gravel and pour it into the spaces and a hand broom to sweep the gravel into all the spaces.
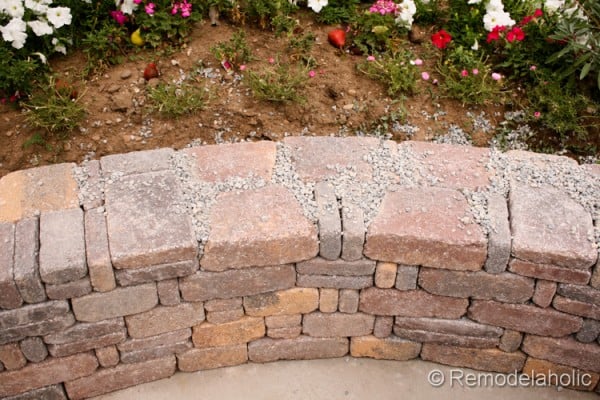
At this point with five layers, I was ready for the cap pieces.
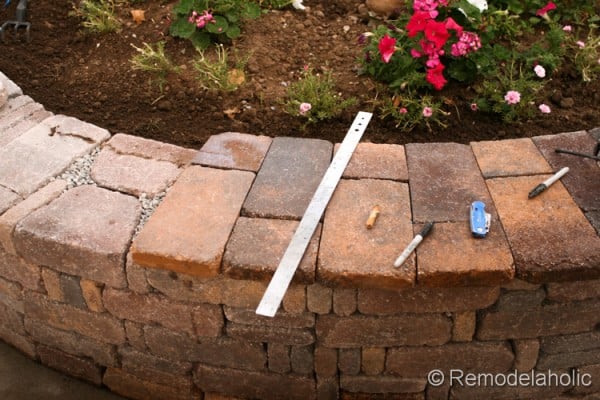
8. The top cap
A cap will cover up all the gravel holes and make a nice finished place for sitting. We decided to add a small 1″ lip to the cap for dimension. It worked out perfectly to cut a long rectangle in half for the pattern to work. This saved us from having to buy more blocks. Awesome!
Because of the curved design, I had to cut each side of the block to make it a trapezoid. This took a lot of time, but it was well worth the final look. I also hammered the cut edge to make it rough so it matched the “rustic” tumbled edges of the Pavestone blocks.
I rented a paver saw for a day and it took me the WHOLE day to cut all the cap pieces: 8 am to 9 pm! I think I got my money’s worth.
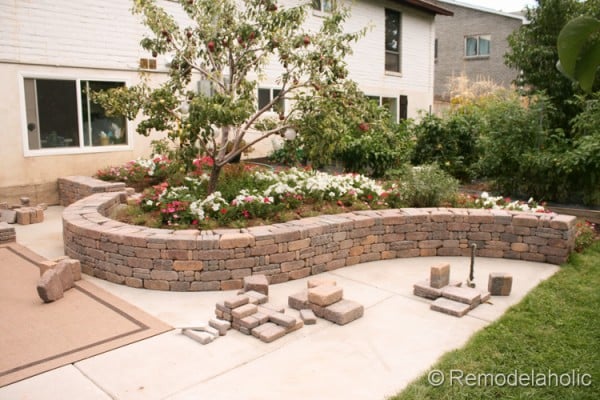
9. Corner Platforms
We added two raised corner platforms on either side of the stairs.
They make the perfect place for a potted plant!

We are in LOVE with this space after all we have done, including the fire pit we built with matching blocks.
Our backyard was pretty basic but now it’s beautiful and we spend as much time there as we can!
Please come follow along with us on all sorts of basic-to-beautiful projects. Find us on Instagram, YouTube, Pinterest, and Facebook.
More backyard ideas:
- DIY Pergola with Swings and Firepit (and optional outdoor movie screen!)
- DIY Pergola Tutorial – How to build your own backyard shade
- 25 DIY Backyard Games
- DIY Outdoor Projects for a Summer-Ready Yard
Stick around here at Remodelaholic and check out all of our Outdoor Woodworking Plans and Tutorials and don’t miss our recipes or remodel and decorating inspiration.
First published 19 Sept 2013 // Last updated 29 Jan 2021
I am the husband of the amazing Cassity of Remodelaholic. I love to problem solve and to design and build things inside and outside the house to make life better. I am a professional Landscape Architect by trade and love the outdoors.


That is AMAZING !!!!!!!!!!!! It looks so so good! Good job guys!!!!
Thanks Iris!
Wow! That’s some hardcore work that turned out just beautiful! Thanks for sharing, I may need to Referance this in the future!
Awesome. Looks beautiful. How long did it take you start to finish?
John, I estimated over 40 hours just for the wall.
This fire pit and stone wall/bench turned out beautifully – Great job!
Your wall and fire pit are gorgeous!!!!!!! I know you are enjoying your backyard.
Linda, we do enjoy it very much. Thanks for the comment.
hat tip … We are working on our a patio now (as I have mentioned), so I definitely appreciate your hard work and am simply in awe of your total “backyard plan.” I have been stopped myself by the Rumblestone and am still considering a building a tree ring/seat. again well done, very impressive. sharing now.
Thanks, we love the new yard!
This is BEAUTIFUL!
It honestly looks like it could have been done by a professional. I’m amazed! x
Thanks for the nice comment Karen!
The wall looks absolutely fabulous! The RumbleStone has far more aesthetic appeal to me than the other stacked brick walls. You are really selling me on this product. My question is with so many different sizes of brick how hard is it to calculate how much you need for a project? (I had called a dealer and the person on the other end the phone did not seem too bright.) Do you purchase by the pallet that comes in a variety or do you purchase by the type of brick. My nearest dealer is 20-36 miles away so if I use RumbleStone I need to be sure of my supply as running back and forth if I run out of a certain type of brick is not an option. Also I realize you guys get products either free or at a discount for the advertising of this nature but it would be nice to know even a ballpark figure of what a project – wall – this size would cost. (You can find the firepit kit costs online.) It helps knowing when and if we can dip our feet in the waters of your inspiration or how bad I want to break my piggy bank open. Thanks, that backyard is absolutely amazing now.
Suzanne, I will have to get back with you on your questions. I will try to figure out how much of each that I used. They gave me five different sizes and I used more of one than another. It all depends on the pattern that you want to create. There are many that can be done with their sizes. I will try and get back to this as soon as I can.
Beautiful! Thanks for providing such detailed information and pictures of everything — especially the tricky parts — so that others can recreate!! Just FYI, the plural of sister-in-law is sisters-in-law. ^.^
you did a great job and those are my favorite stones, it is amazing congrats.
I am in awe. Since I was a teenager, probably, I have been fascinated by rock walls. Whether they are “fences” erected by folks in the country many years ago, or especially in a back yard. I’m not a deck person — I’m a patio person. My dream house will have a generous patio with a seat wall made of rock. And a fire pit is just the cherry on top. Love it!
Looks great! I love the effect of the bricks, they look ‘rustic’, but modern!
This is beautiful! I plan to do something similar to make a turtle enclosure for our box turtles. This will be perfect!
How fun! I’d love to see pictures!
Thank you so much for sharing this project step-by-step! I love it and will definitely use it as a reference to design our yard. Thank you!
You’re welcome, Marlene!
What was the cost of materials for the wall. How many linear feet was it. I would love to see our local park do this to provide a wall with seating.
Charlotte that wall was about 30′ long and with about 4 pallets of stone materials was over $2400.
Fantastic. I love everything you did here. The end results is breathtaking. I am envy with green. Thank you so much for sharing your outstanding work. You nailed this project
Thanks, Ivory!
Oh my goodness! This is absolutely beautiful. I am in complete awe of your ability to do this. Thanks for sharing such this project in such detail. I’d like to try something on a smaller scale first; perhaps your fire pit will be my first project, as ours is in need of a “reno”.
Thanks for the kind comment, Beth! We also built a great new planter that would be a great starting project — we’ll be sharing that in a couple of weeks so stay tuned 😉
Great blog! Awesome, I really loved the pictures and enjoyed the reading. Thank you for sharing such qualitative information.
Really love the fire pit and the curved seat. PERFECTION!!!! I really love this! Thanks a lot for sharing this! Usually I never comment on blogs but your article is so convincing that I never stop myself to say something about it. You’re doing a great job Man,Keep it up.
Kenneth, thanks for the comment. I love reading them and hearing that our articles are so helpful. Have an amazing day!